Previous Page
Next Page

Preboot Execution Environment (PXE)

The Preboot Execution Environment, or PXE, is a direct form of network boot that can be used to install the Solaris Operating Environment over the network using DHCP. It does not require the client to have any form of local boot media.

PXE is only available to x86 systems that implement the Intel Preboot Execution Environment specification. You will need to consult the hardware documentation for your system to determine whether or not it supports the PXE network boot.

To use PXE, you need three systems. These are as follows:

  • A configured install server containing the Solaris boot image and images of the Solaris CDs

  • A configured DHCP server from which to boot successfully

  • An x86 client that supports the PXE network boot

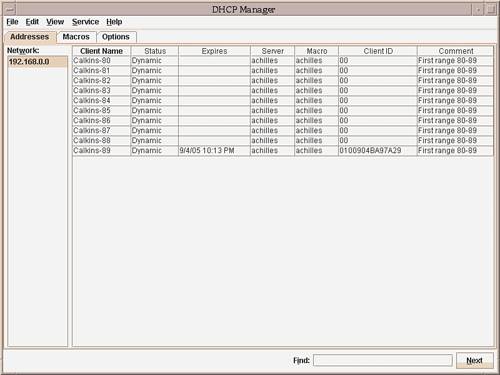
Note

Only One DHCP ServerYou must make sure that there is only one DHCP server on the same subnet as the PXE client because the PXE network boot does not work properly on a subnet containing multiple DHCP servers.


Preparing for a PXE Boot Client

As you saw in the previous section, three systems are required in order to be able to make use of the PXE network boot. The first of these is the install server. Setting up the install server is described earlier in this chapter in the section "The Install Server." The procedure for an x86 install server is the same, but you will be storing x86 CD images instead of SPARC.

Note

You Can Still Use SPARCEven though you are setting up an x86 installation, you can still use a SPARC system as your install server if you wish. All it does is share the CD images over the network, and a single install server can serve both SPARC and x86 clients. Remember that you cannot run setup install server on a SPARC system using an x86 CD, or vice versa, but you can from a DVD.


The third system is also very straightforward because you have to consult your hardware documentation to verify whether PXE network boot is supported by the BIOS. It is worth investigating whether an upgrade to the BIOS firmware is necessary as well.

It is the second of these systems that requires the most work. Configuring a DHCP server is beyond the scope of this exam and is covered completely in the Solaris 10 Network Administrator Exam (Exam 310-302). It is necessary, however, to create some vendor class macros so that the correct configuration information is passed to the client when booting across the network.

Note

DHCP Already ConfiguredYou should note that a working DHCP server should already be configured. The details described in this section merely configure some parameters within the DHCP server.


Configuring the DHCP Server

There are a few parameters that need to be configured to ensure that the client, when booted, has all the information it requires in order to boot successfully, and then access the install server containing the correct CD images, required for the installation of the Solaris Operating Environment. Table 14.25 lists some of the most common parameters.

Table 14.25. Vendor Client Class Options

Symbol Name

Code

Type

Granularity

Max

Description

SrootIP4

2

IP Address

1

1

The root server's IP address

SrootNM

3

ASCII Text

1

0

The root server's hostname

SrootPTH

4

ASCII Text

1

0

The path to the client's root directory on the root server

SinstIP4

10

IP Address

1

1

The JumpStart install server's IP address

SinstNM

11

ASCII Text

1

0

The JumpStart install server's hostname

SinstPTH

12

ASCII Text

1

0

The path to the installation image on the JumpStart install server


The fields are described here:

  • Symbol Name The name of the symbol.

  • Code A unique code number.

  • Type The data type of the entry.

  • Granularity The number of instances. For example, a symbol with a data type of IP Address and a Granularity of 2 means that the entry must contain two IP addresses.

  • Max The maximum number of values. For example, a symbol with a data type of IP Address, Granularity of 2, and Maximum of 2 means that the symbol can contain a maximum of two pairs of IP addresses.

  • Description A textual description of the symbol.

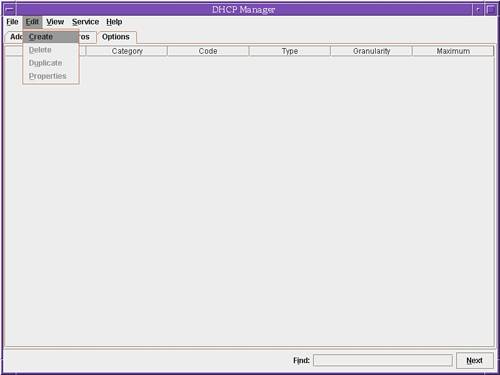
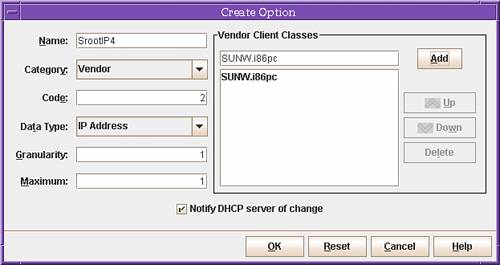
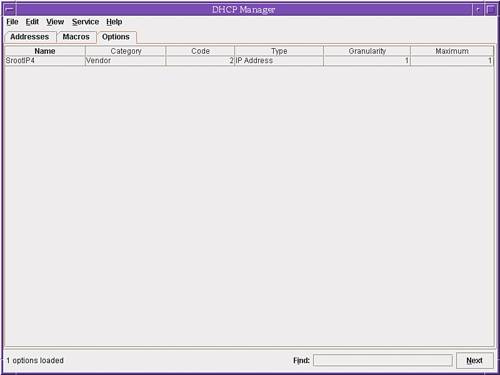
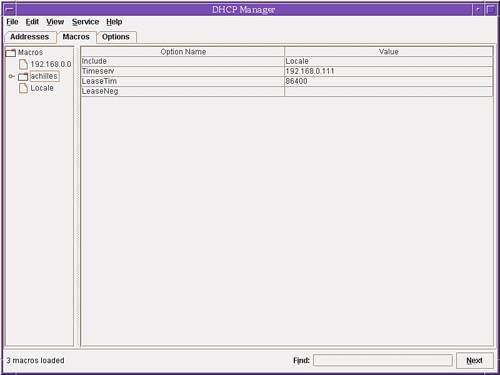
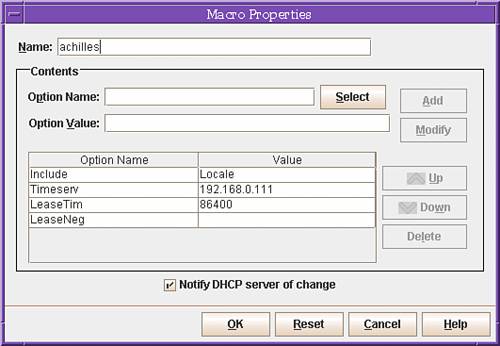
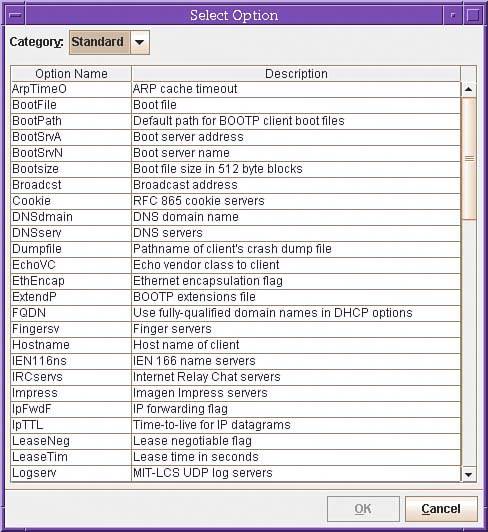
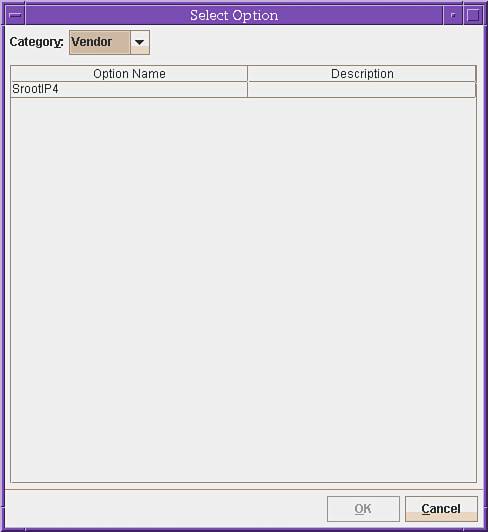
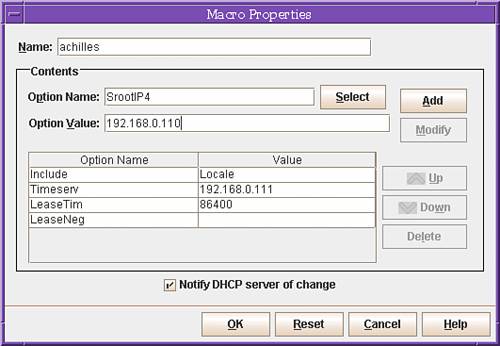
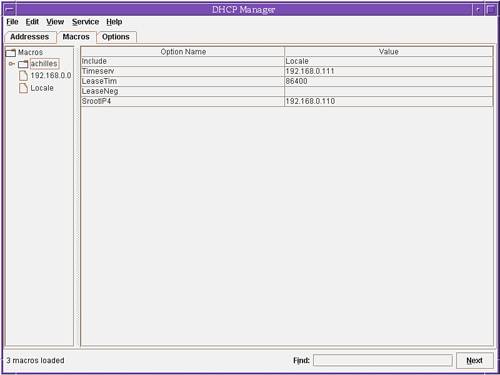
You can add these symbols to the DHCP server using either the command dhtadm or the GUI-based dhcpmgr commands. The example here shows how to add a symbol (SrootIP4) and Vendor Client Class (SUNW.i86pc) to the achilles macro using the GUI-based dhcpmgr.

1.
Start dhcpmgr by entering /usr/sadm/admin/bin/dhcpmgr& from any CDE window. The DHCP manager window appears as shown in Figure 14.6

Figure 14.6. DHCP Manager window.


Note that the DHCP server is already configured to support 10 IP addresses and that the DHCP server name is achilles.

2.
Select the Options tab and the Options window appears. From the Edit menu, select Create as shown in Figure 14.7

Figure 14.7. DHCP Options window.


3.
A sub window appears to create the option. Enter the name SrootIP4 in the Name field. The next field is a pull-down menu; select Vendor from this menu as shown in Figure 14.8.

Figure 14.8. DHCP Create Options window.


4.
Refer back to Table 14.25, which lists the valid values for the symbols to be added. In this case, the code value for the symbol SrootIP4 is 2. The type is currently set to IP Address, which is correct. Table 14.25 also states the values for Granularity and Maximum; enter these accordingly into their correct locations.

5.
On the right side of the window is the Vendor Client Classes box. This is where you specify which class of systems the option applies to. For this example, if an x86 client is being used, the client class is SUNW . i86pc. Enter this in the box provided and click Add. The class now appears in the list as shown in Figure 14.9.

Figure 14.9. DHCP completed Create Options window.


6.
Make sure the box marked Notify DHCP server of change is checked and click OK to complete the operation.

7.
You are returned to the Options window, which now includes the symbol just created. Figure 14.10 shows this.

Figure 14.10. DHCP Options window with a symbol defined.


8.
The remaining symbols can be added by repeating the previous steps.

9.
To add the symbol SrootIP4 to the achilles macro, select the Macro tab and the achilles macro from the list on the left. Figure 14.11 shows the current contents of this macro.

Figure 14.11. The achilles macro.


10.
From the Edit menu, select Properties. Figure 14.12 shows the Properties window.

Figure 14.12. The Properties window.


11.
You need to locate the symbol that you want to add, so click on Select to the right of the Option Name field. The Select Option window appears as shown in Figure 14.13.

Figure 14.13. The Select Option (Standard) window.


12.
The symbol just created is a Vendor class symbol and the options being displayed are standard symbols. The selector field is a pull-down menu, so click on the menu and choose Vendor. The symbol SrootIP4 is now displayed as shown in Figure 14.14.

Figure 14.14. The Select Option (Vendor) window.


13.
Click on the symbol SrootIP4 and then click OK to display the Macro Properties window. This symbol identifies the IP Address of the JumpStart root server, which is 192.168.0.110 for this example. Enter this in the Option Value field as shown in Figure 14.15.

Figure 14.15. The Macro Properties window.


14.
Click Add to insert the symbol and value into the macro properties. Figure 14.16 demonstrates that the symbol SrootIP4 has been added to the macro.

Figure 14.16. The Macro Properties window with symbol added.


15.
When you click OK to complete the operation, you are returned to the macro window, showing the contents of the achilles macro. Figure 14.17 shows the completed operation.

Figure 14.17. The achilles macro with symbol added.


16.
Repeat this operation for the other symbols that the DHCP server requires to properly support the PXE network boot.

When the macro and symbols have been configured, the DHCP server is ready to handle the client correctly when it boots across the network.

Adding an x86 Client to Use DHCP

Having configured the DHCP server, the only remaining task is to add the client to the install server. This is carried out using the add_install_client command, virtually the same as for a custom JumpStart, but this time the majority of the configuration information will be supplied by the DHCP server. The following command adds support for the SUNW.i86pc class of system:

# cd /export/install/x86pc/Tools
# ./add_install_client -d SUNW.i86pc i86pc

Booting the x86 Client

When the install server and the DHCP server have been configured correctly and the x86 client has been added, the only remaining thing to do is to boot the x86 client to install over the network. The way in which this is done depends on the hardware that you have, but usually one of the following will have the desired effect:

  • Enter the system BIOS by typing the appropriate keystrokes

  • Configure the BIOS to boot from the network

  • Adjust the boot device priority list, if present, so that a network boot is attempted first

  • Exit the system BIOS

The system should start booting from the network and should prompt you for the type of installation you want to run. The remainder of the installation process depends on which installation type you choose.

Note

Set Boot Options BackRemember when the installation finishes and the system reboots, to re-enter the system BIOS and restore the original boot configuration.


Previous Page
Next Page