Solaris FlashObjective: Explain Flash, create and manipulate the Flash archive, and use it for installation. The main feature of Solaris Flash is to provide a method to store a snapshot of the Solaris operating environment, complete with all installed patches and applications. This snapshot is referred to as the Flash archive and the system that the archive is taken from is referred to as the master machine. This archive can be stored on disk, CD-ROM, or tape media. You can use this archive for disaster recovery purposes or to replicate (clone) an environment on one or more other systems. When using a Flash archive to install the Solaris environment onto a system, the target system we are installing the environment on is referred to as the installation client. When you're ready to install the Solaris environment using the Flash archive, you can access the archive on either local media or across the network. Furthermore, when installing from a Flash archive onto the installation client, the install can be modified from the original archive to accommodate things such as kernel architecture, device differences, or partitioning schemes between the master machine and the installation client. In this section, we describe how to create the Flash archive and how to install the operating system on an installation client from a Flash archive. Note Flash Install Enhancement A Flash installation can now be used to update a system, using a differential Flash Archive. Previously, a Flash Install could only be used to perform an initial installation. A new install_type of flash_update is available with Solaris 10. Creating a Flash ArchiveThe first step is to identify the master machine. This system will serve as the template for the archive and all software and data on the master machine, unless specifically excluded, will become part of the Flash archive that will be installed on the installation client. Next, make sure that the master machine is completely installed, patched, and has all of its applications installed. Depending on the application, you may want to create the archive before the application is configured however. This will allow you to configure the application specifically for each system it is running on. To ensure that the archive is clean, it's recommended that the archive be created before the master machine has ever gone into production and while the system is in a quiescent state. Finally, determine where the archive will be stored. You can store the archive onto a disk, a CD-ROM, or a tape. Once the archive has been stored, you can even compress it so that it takes up less space. Because these archives can be used for disaster recovery, store the archive somewhere offsite. You'll use the flarcreate command to create the archive. The syntax for the command is as follows: flarcreate -n name [-R root] [-A system_image] [-H] [-I] [-M] [-S] [-c] \ [-t [-p posn] [-b blocksize]] [-i date] [-u section...] [-m master] \ [-f [filelist | -] [-F]] [-a author] [-e descr | -E descr_file] \ [-T type] [-U key=value...] [-x exclude...] [-y include...]\ [-z filelist...] [-X filelist...] archive The options to the flarcreate command are described in Table 14.24. In the previous command syntax, <archive> is the name of the archive file to be created. If you do not specify a path, flarcreate saves the archive file in the current directory. Additional options are available, such as for creating the archive on tape and adding some user-defined options. Information on these options is found in the online manual pages and in the Solaris 10 Installation Guide in the Solaris 10 Release and Installation Collection. The following example shows how to use the flarcreate command to create the Flash archive: flarcreate -n "Solaris 10 Ultra Archive" -a "WS Calkins" \ -R / -x /var/tmp /u01/ultra.flar In the previous example, we are creating a Flash archive named "Solaris 10 Ultra Archive." We are specifying the author (creator) to be labeled as "WS Calkins." The -R option specifies to recursively descend from the specified directory. We also specify the -x option to exclude /var/tmp. The last part of the command specifies which directory to store the archive in and what to name the archive. After entering the command and pressing the Return key, the flarcreate command will display the status of the operation as follows: Full Flash Checking integrity... Integrity OK. Running precreation scripts... Precreation scripts done. Determining the size of the archive... 7462766 blocks The archive will be approximately 3.55GB. Creating the archive... 7462766 blocks Archive creation complete. When the operation is complete, I can see the archive file by issuing the ls command as follows: ls -l /u01/ultra.flar -rw-r--r-- 1 root other 3820943938 Sep 3 11:12 \ ultra.flar The flar command is used to administer Flash archives. With the flar command, you can
To use the flar command to extract information from an archive, use the following command: flar -i /u01/ultra.flar The system displays the following information about the Flash archive: archive_id=fb2cfa3c51d3af4a10ce6e804243fe19 files_archived_method=cpio creation_date=20050903111231 creation_master=ultra10 content_name=Solaris 10 Ultra Archive creation_node=ultra10 creation_hardware_class=sun4u creation_platform=SUNW,Ultra-5_10 creation_processor=sparc creation_release=5.10 creation_os_name=SunOS creation_os_version=Generic files_compressed_method=none files_archived_size=3820943929 content_author=WS Calkins content_architectures=sun4u type=FULL For additional information on the flarcreate or flar commands, refer to the online manual pages or the Solaris 10 Installation Guide in the Solaris 10 Release and Installation Collection. Using the Solaris Installation Program to Install a Flash ArchiveIn the previous section we described how to create a Flash archive. In this section, you learn how to install this archive on an installation client using the GUI-based Solaris installation program. The Flash archive was created on a system named ultra10 with the IP address of 192.168.0.110 and placed into a file system named /u01. On ultra10 we need to share the /u01 file system so that the archive is available to other systems on the network via NFS. You use the share command to do this. NFS and the share command are described in Chapter 9. Initiate a Solaris installation from CD-ROM. When prompted to select the Installation Media as shown in Figure 14.1, select Network File System. Figure 14.1. Specify Media window.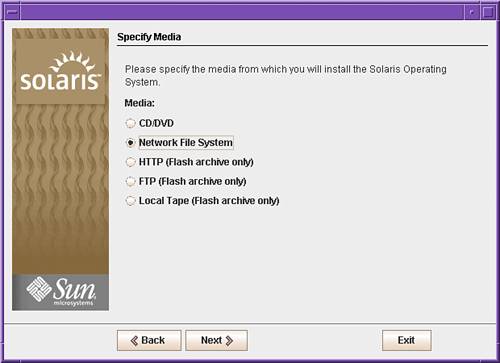
Click on the Next button and you'll be prompted to enter the path to the network file system that contains the Flash archive as shown in Figure 14.2. Figure 14.2. Specify Network file system path window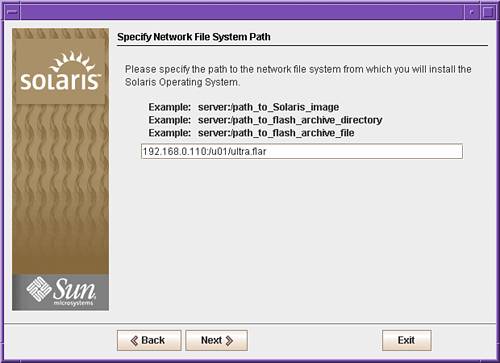
After entering the path, click on the Next button and the Flash Archive Summary window will appear as shown in Figure 14.3. Figure 14.3. Flash Archive Summary window.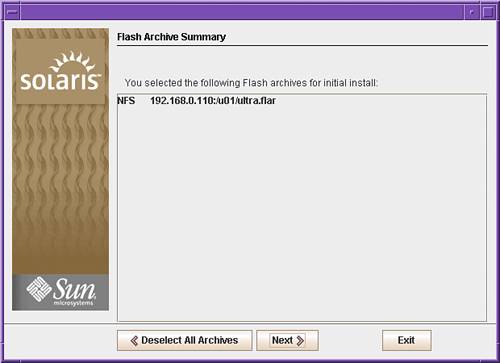
The selected archive will be listed. Verify that it is correct and then click on the Next button to continue. You'll be prompted to enter any additional archives that you would like to install, as shown in Figure 14.4. Figure 14.4. Additional Flash Archives window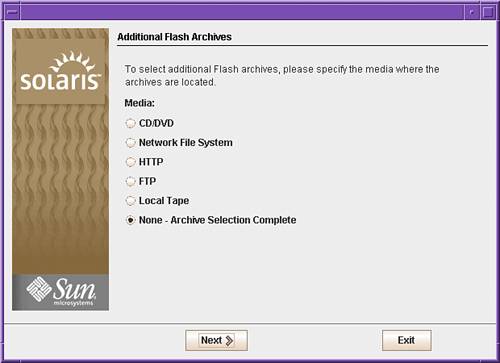
We have no additional archives to install, so you'll click on the Next button and the system is initialized as shown in Figure 14.5. Figure 14.5. Initialization window.
After the system initialization is finished, you'll see the Disk Selection window displayed as with a normal GUI-based installation. From this point forward, the installation will continue as a normal GUI-based installation. The difference is that you will not be asked to select the software that you want to install. Instead, the entire Flash archive will be installed. When the installation is complete, the system will reboot (if you selected this option during the earlier dialog), and the login message will appear. The final step is to log in as root, configure your applications, and make system-specific customizations. The system is now ready for production use. Solaris Flash and JumpStartEarlier in this chapter, we described how to set up a JumpStart installation. If you recall, we set up a boot server, which provided the information that a JumpStart client needed to boot across the network. We also set up an install server, which supplied the Solaris image, and we created the profile and rules configuration files which provided additional setup information such as disk partitions and software packages. You can utilize a Solaris Flash archive in a JumpStart installation, but first you need to add the installation client to the JumpStart boot server as described earlier in this chapter. The next step is to create a profile for the installation client. This was also described earlier in this chapter. However, when using JumpStart to install from a Flash archive, only the following keywords can be used in the profile:
Here's an example profile for an installation client using a Flash archive: install_type flash_install archive_location nfs://192.168.0.110/u01/ultra.flar partitioning explicit # #8 GB / and 1GB swap on a 9GB Disk # filesys rootdisk.s0 free / filesys rootdisk.s1 1:449 swap The rules and sysidcfg files for the Flash installation client would be the same as described earlier in this chapter. When finished configuring the profile, rules, and sysidcfg files, and assuming the Flash archive is available on the install server in a shared file system, you can boot the installation client using boot net - install The automated installation will proceed without further intervention and the system will be installed using the Flash archive. |