Hack 41. Create Your Own Search Plug-in
Found a search engine that suits you? Put it up front on the Search bar. Now that we've looked at a sample plug-in [Hack #36], let's make our own. We'll query for articles in the CNET News.com archive. The first step is to visit the web site and conduct a sample query, to see how the query URL is formed. Go to http://www.news.com, enter firefox in the Search box, and click on "See all matching results." This submits the following query: http://news.search.com/search?q=firefox&cat=230&int.1278=1 From this we can deduce the following items for our plug-in:
4.10.1. Building the Plug-inWith the information in the previous section in hand, we have enough details to build most of our plug-in: <search version="1.0" name="CNET News.com" description="Search CNET News.com" method="GET" action="http://news.search.com/search" > <input name="q" user> <input name="cat" value="230"> <input name="int.1278" value="1"> <input name="sourceid" value="Mozilla-search"> If we look at the HTML source, we can see that the results are neatly captured as an enumerated list, with each news story as a list item. We can use this information to build the interpret tag in the following code. We'll also add a browser tag, so we can make our plug-in available to other users and enable them to retrieve updates automatically when the site changes and we change our plug-in to accommodate it: <interpret
resultListStart="<ol start="
resultListEnd="</ol>"
resultItemStart="<li>"
resultItemEnd="<br>"
>
<browser
update="http://www.kswartz.com/kswartz/projects/mycroft/cnetnews.src"
updateIcon="http://www.kswartz.com/kswartz/projects/mycroft/cnetnews.png"
updateCheckDays=3
/>
</search>There's a lot more that can be done with Mycroft plug-ins than just tabulating simple results. For a complete definition of the plug-in syntax, read the Mycroft Developer's Guide at http://mycroft.mozdev.org/deepdocs.html. All that's left now is to create a 16 16 icon for the site, which is left as an exercise for the reader. Remember to save it with the same basename as your search plug-in.
4.10.2. Installing the Plug-inBefore we install the plug-in, it's usually a good idea to run it through a validator, such as the one available at http://www.mindzilla.com/auditform.php. You can use this page to verify your plug-in syntax, as well as to verify your list and item start/end identifiers. If the validation page reports no errors in your plug-in, it's time to install it. There are two ways you can install your plug-in. If you are only developing the plug-in for yourself, you can manually install it by copying the file to the searchplugins directory where Firefox is installed and restarting your browser to have it reread that directory. Alternatively, you can post the files to a web site, and use this JavaScript code to download the files to the searchplugins directory and dynamically update the list of known plug-ins: <script type="text/javascript">
function addEngine(name,ext) {
if ((typeof window.sidebar == "object") &&
(typeof window.sidebar.addSearchEngine == "function")) {
window.sidebar.addSearchEngine(
"http://mycroft.mozdev.org/plugins/"+name+".src",
"http://mycroft.mozdev.org/plugins/"+name+"."+ext,
name, '');
}
}
</script>Include the preceding code on an HTML page, and then link to your search plug-in with the following line: <a href="javascript:addEngine('myplugin','png')">Install myplugin</a>At this point, you should see the icon and name of your plug-in in the drop-down list of the Search box, as shown in Figure 4-20. Figure 4-20. Searching with your new plug-in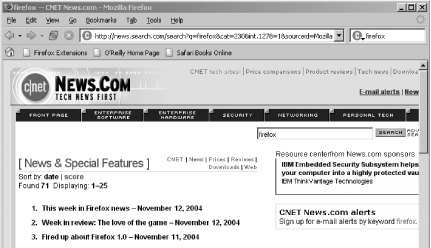 Your new search plug-in is ready to use! Keith M. Swartz |
