1.4. Creating a ProjectEarlier sections of this chapter introduced the Eclipse workbench and showed a number of ways to customize the environment. The next step is to actually use Eclipse to get some work done. This section takes you through the steps needed to create your first Eclipse project. In the basic Eclipse environment, three different types of projects, simple, Java, and plug-in development, can be created.
1.4.1. Using the new Java Project wizardTo create a new Java project, select the File > New > Project... command or click the Figure 1-15. New Project wizardselecting the project type.The Eclipse 3.1 version is shown on the left and the Eclipse 3.2 version is shown on the right. The Eclipse 3.2 version adds a filter field above the list of wizards. 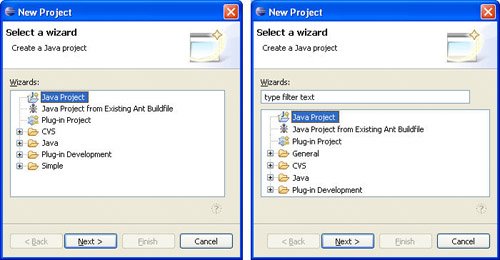
On the second page of the wizard (see Figure 1-16), enter the name of the project (e.g., "First Project") and click the Next button. Note that this page also includes options for specifying the location of the project and its structure. By default, the project will be placed within the workspace directory and will use the project folder as the root for sources and class files. Figure 1-16. New Project wizardnaming the project.The Eclipse 3.1 version is shown on the left and the Eclipse 3.2 version is shown on the right. Note the minor differences in terminology used in the center section of the pages. 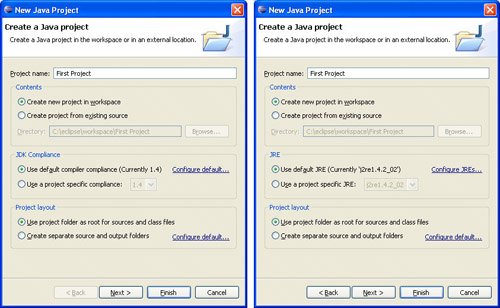
The next page of the wizard (see Figure 1-17) contains build path settings for the Java project. The Source tab provides a place to add source folders, which act as roots for packages containing Java files. The Projects tab allows you to set up project dependencies by selecting other projects in the workbench on which this project depends. Figure 1-17. New Project wizardspecifying Java build settings.The Eclipse 3.1 version is shown on the left and the Eclipse 3.2 version is shown on the right. Note the addition of the Create new source folder option in the Details section of the right page. 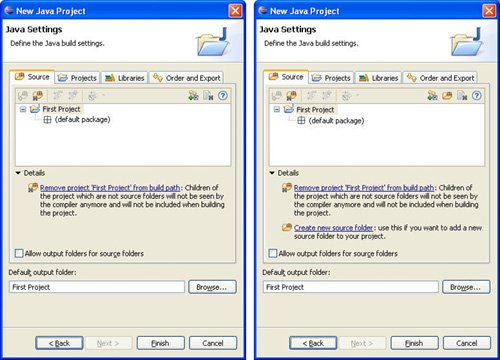
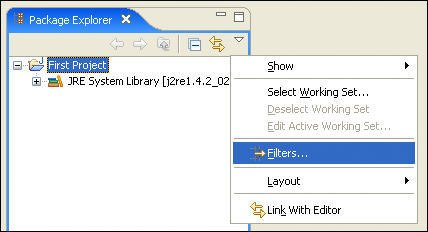
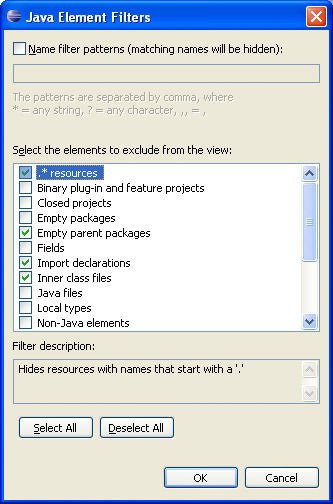
Tip Traditionally, source files are placed in a separate source folder named src and the compiler output is in a bin directory. Placing these types of files in separate directories results in an easier build process. Use the Java > Build Path preference page to specify the default directory names used when creating new Java projects. The Libraries tab is the place to add JAR files (either stored in the workbench or out on the file system). The last tab, Order and Export, controls the order of build path elements and whether they are exported and visible to other projects that require this project. The Default output folder field, at the bottom the page, is used to specify the default location where compilation output will be stored. When the Finish button is clicked, the new project is created and appears in the Package Explorer view or the Navigator view, depending on which perspective is active. Differences between Eclipse 3.1 and 3.2 As you can see from the last three screenshots, there are a number of minor differences between Eclipse 3.1 and 3.2. For the most part, the differences won't impact your use of this book; however, differences will be highlighted whenever they are relevant or interesting. 1.4.2. .classpath and .project filesIn addition to creating the project itself, two additional files are created.classpath and project. By default, both of those files as well as any other files beginning with "." are hidden from view via a filter. To show the files, select the Filters... command from the drop-down view menu in the Package Explorer (see Figure 1-18), uncheck the .* resources filter in the Java Element Filters dialog (see Figure 1-19) and click the OK button. Figure 1-18. Filter menu.
Figure 1-19. Filter dialog.
The .classpath file stores the Java build path for the project. It should look something like the following for the project you just created: <?xml version="1.0" encoding="UTF-8"?>
<classpath>
<classpathentry kind="src" path=""/>
<classpathentry kind="con"
path="org.eclipse.jdt.launching.JRE_CONTAINER"/>
<classpathentry kind="output" path=""/>
</classpath>
Rather than editing the .classpath file directly, Eclipse provides a more user-friendly approach. Right-click on the project and select Properties. In the Properties dialog, selecting Java Build Path displays an interface similar to Figure 1-17 for editing the project's classpath. Java Build Path "Java classpath" is a generic term describing both the classpath used at compile-time and the classpath used at runtime. In Eclipse, the compile-time classpath is called the Java build path. When you are running or debugging Java application code, the runtime classpath is determined by the launch configuration (see Section 1.9.2, Launch configurations, on page 56). When you are developing Eclipse plug-ins, the runtime classpath is determined by the dependency declaration in the plug-in manifest (see Section 2.3.1, The Plug-in manifests, on page 71). The .project file provides a complete description of the project suitable for recreating it in the workbench if it is exported and then imported. Your new project should look like the following: <?xml version="1.0" encoding="UTF-8"?>
<projectDescription>
<name>First Project</name>
<comment></comment>
<projects>
</projects>
<buildSpec>
<buildCommand>
<name>org.eclipse.jdt.core.javabuilder</name>
<arguments></arguments>
</buildCommand>
</buildSpec>
<natures>
<nature>org.eclipse.jdt.core.javanature</nature>
</natures>
</projectDescription>
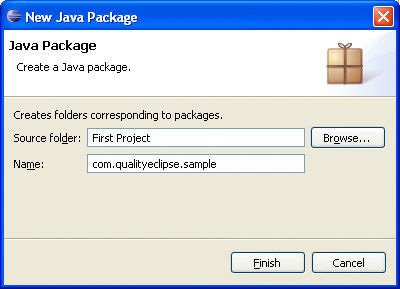
The nature tag indicates what kind of project this is. The nature, org.eclipse.jdt.core.javanature, indicates that it is a Java project. 1.4.3. Using the Java Package wizardTo create a Java package, select File > New > Package or click the Figure 1-20. New Java Package wizard.
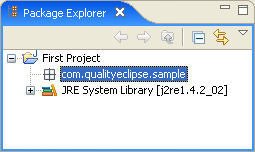
Note that the icon next to the new Java package name (see Figure 1-21) is hollow, indicating that it is empty. When one or more Java files are added to the package, the icon will appear in color. Figure 1-21. New Java package in the Package Explorer.
1.4.4. Using the Java Class wizardTo create a Java class, select File > New > Class or click the Figure 1-22. New Java Class wizard.
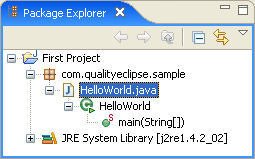
This process creates a new Java class (see Figure 1-23). The entry, HelloWorld.java, represents the file itself. Expanding that item reveals elements representing the class and its single "main" method. Note that the icon next to the package name is now in color, indicating that it is no longer empty. Figure 1-23. New Java class in the Package Explorer.
|