1.2. The Eclipse WorkbenchTo start Eclipse, double-click on the eclipse.exe file in the C:\eclipse directory. The first time Eclipse is launched, it displays a dialog in which you can select the location for your workspace directory (typically a directory underneath your user directory). To avoid seeing this dialog every time you start Eclipse, check the Use this as the default and do not ask again option. Tip Creating a shortcut for launching Eclipse provides a way to specify an alternative workspace directory as well as increases the amount of memory allocated to the program. For example: C:\eclipse\eclipse.exe -data C:\MyWorkspace -vmargs -Xms128M -Xmx256M In this example, the workspace has been set to C:\MyWorkspace, the starting amount of memory to 128 MB, and the maximum amount of memory to 256 MB. Setting the workspace location is essential if you plan to migrate to newer versions of Eclipse in the future. A complete list of these and other command-line switches, such as -vm and -showlocation, can be found in the online help (see Chapter 15, Implementing Help) under Workbench User Guide > Tasks > Running Eclipse. For more on memory usage, see www.qualityeclipse.com/doc/memory.html. In a few moments, the main Eclipse workbench window appears (see Figure 1-2). Normally, it consists of a main menu bar and toolbar as well as a number of tiled panes known as views and editors (these will be discussed in great detail in Chapters 7, Views, and 8, Editors). Initially, only a full-screen welcome page, known as the Welcome view, is visible and fills the entire workbench window. Figure 1-2. Eclipse workbench window.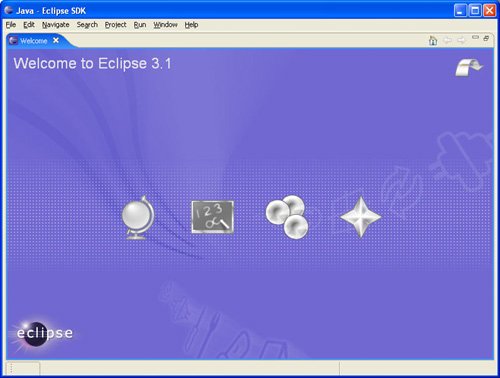
The Welcome view opens automatically the first time that Eclipse is launched (it can be reopened at any time by using the Help > Welcome command). Take a moment to look it over as it provides links to other tools and resources to get you started with Eclipse such as an overview, tutorial, and a list of sample applications. Closing the Welcome view (by clicking the "X" button on its title tab) will reveal several additional views (see Figure 1-3). Figure 1-3. Workbench window with the Package Explorer view active.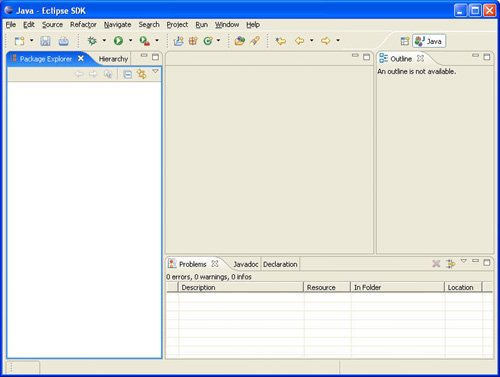
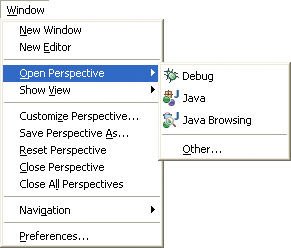
1.2.1. Perspectives, views, and editorsCollectively, the combination of various views (e.g., Package Explorer, Hierarchy, Outline, Problems, Javadoc, and Declaration) and editors (used to work with various resources) visible within the Eclipse workbench are known as a perspective. A perspective can be thought of as one page within the Eclipse workbench. Multiple perspectives can be open at one time, and each has an icon (with or without a text description) visible in the perspective toolbar at the upper right corner of the workbench window. The perspective that is currently active has its name shown in the title bar of the window and its icon appears selected. Views are typically used to navigate resources and modify properties of a resource. Any changes made within a view are saved immediately. By contrast, editors are used to view or modify a specific resource and follow the common open-save-close model. Every perspective has its own set of views, but open editors are shared by all open perspectives. Only a single instance of any one view can be open in a given perspective, while any number of editors of the same type can be open at one time. The currently active view or editor has its title bar highlighted. This is the view or editor that will be the recipient of any global actions such as cut, copy, or paste. All the other panes are inactive and their title bars appear grayed out. For instance, when you click on the Package Explorer view, its title bar becomes highlighted, indicating that it is active (see Figure 1-3), and the title bars of the other views turn gray, indicating that they are now inactive. Views and editors can be resized by dragging the sizing border that appears on each side of the pane. Since Eclipse uses a tiled display for each of its panes, making one larger makes its neighbors smaller, and vice versa. Panes can be moved around by dragging their individual title bars. If you drag a view onto another view, the two views will stack up with tabs indicating each of the views. Selecting a tab brings that view to the top of the stack. If a view is dropped into the sizing area between views, the view grabs a portion of the available area and inserts itself next to the view that previously occupied that space. The views that originally occupied that space shrink in size to accommodate the new view. Right-clicking on a view's tab and selecting the Fast View command causes the view to dock to the fast view bar at the bottom edge of the window (you can drag the fast view bar to the left or right side of the window as well). Fast views remain docked to the fast view bar as icons until clicked on, at which point they expand to overlap most of the window area. Fast views are ideal for views that don't need to be seen all the time, but require a great deal of screen area when they are visible. Right-clicking and selecting the Detached command causes the view to open into a separate, floating window that can be moved outside of the workbench area or that can float on top of the workbench area. Selecting the Detached command a second time will reattach the view into the workbench window. Many different views are defined within Eclipse and only a few are visible when the workbench first opens. To add views to a perspective, select the Window > Show View command and choose the view you would like to see (or the Other... command to see a list of all views defined in the system). Tip Many third-party plug-ins are available, providing enhancements to the various Eclipse perspectives. For example, CodePro (see Appendix A, Eclipse Plug-ins and Resources) provides color-enhanced versions of the main Eclipse perspectives and views. 1.2.1.1. Java perspectivesAt this point, we should quickly review the various perspectives you are most likely to use while developing plug-ins. The initial perspective shown in the workbench window is the Java perspective (see Figure 1-3). Eclipse includes two perspectives for the development of Java code. Selecting the Window > Open Perspective > Java command opens the first, known as the Java perspective. The primary view within the Java perspective is the Package Explorer. The Package Explorer shows the hierarchy of Java files and resources within the Java projects loaded into your workbench, providing a very Java-centric view of resources rather than a file-centric view. For example, rather than showing Java packages as nested folders as in the Navigator view (see Section 1.2.1.2, Resource perspective, on page 9), the Package Explorer shows each package as a separate element in a flattened hierarchy. Any JAR file that is referenced within a project can also be browsed this way. The second major Java perspective is the Java Browsing perspective. Selecting the Window > Open Perspective > Java Browsing command (see Figure 1-4) opens the Java Browsing perspective (see Figure 1-5). Figure 1-4. Opening the Java Browsing perspective.
Figure 1-5. The Java Browsing perspective.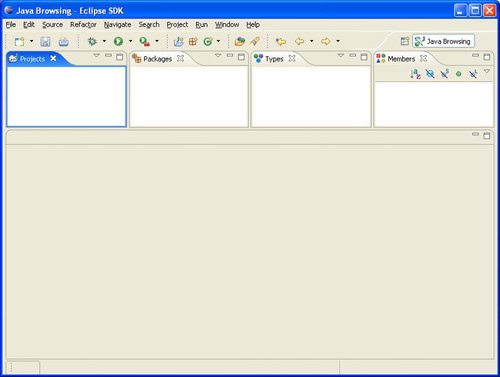
The Java Browsing perspective includes a series of linked views reminiscent of the browsers found in various Smalltalk integrated development environments (IDEs) or within IBM's VisualAge for Java IDE. The first view shows a list of loaded projects. Selecting a project shows its contained packages within the Packages view; selecting a package shows its types in the Types view; and selecting a type shows its members in the Members view. Selecting a method or field in the Members view will highlight that member in the corresponding editor. Tip You can easily drag the individual views around to customize the layout to your taste. To get more vertical real estate associated with the editor area, consider stacking the four views vertically. Another common way to save some space in this perspective is to combine the Projects and Packages views into a single tabbed area, or drag the Projects view onto the fast view bar. 1.2.1.2. Resource perspectiveWhile the Java perspectives provide tools for Java development, they are not ideal for reviewing all the resources in the workspace. The Resource perspective (see Figure 1-6) provides a hierarchical view of the files and folders within your system. Figure 1-6. The Resource perspective.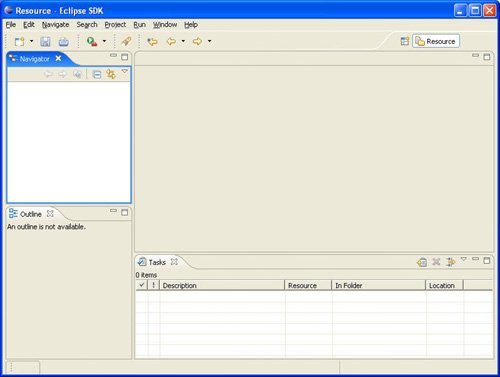
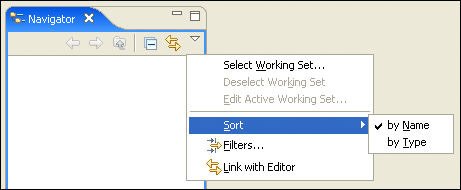
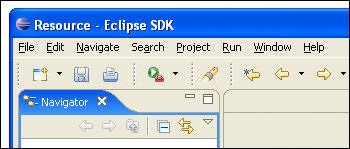
The primary view within the Resource perspective is the Navigator, which presents a hierarchical view of the resources (projects, folders, and files) loaded in the workbench. The Navigator has its own toolbar and view menu (see Figure 1-7), which provide various viewing and filtering options. The view menu is accessed by clicking on the small down arrow on the right side of the view's toolbar. Figure 1-7. The Navigator view.
1.2.1.3. Debug perspectiveEach perspective shown so far has been optimized for the purpose of writing code or editing resources. The next most common type of perspective you will encounter is the Debug perspective, which you can access by selecting the Window > Open Perspective > Debug command (see Figure 1-8). Figure 1-8. The Debug perspective.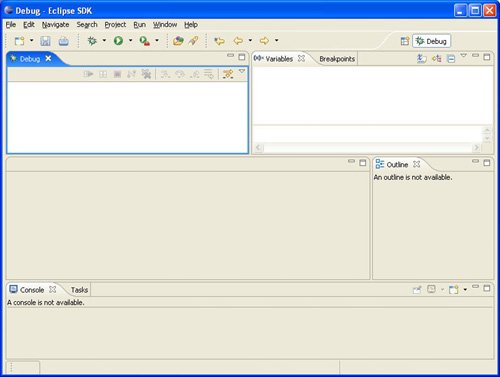
As its name suggests, the Debug perspective is used to debug programs and easily find and correct runtime errors in Java code. You can step through individual statements within your code, set breakpoints, and inspect the values associated with individual variables. This is discusssed in more detail in Section 1.10.1, Setting breakpoints, on page 58. 1.2.2. ActionsIn addition to the views and editors that make up the bulk of the display area, Eclipse includes a number of top-level and context menus and toolbar buttons that represent the various commands or actions available in the system. 1.2.2.1. Top-level menusThe basic Eclipse menu bar includes ten top-level menus: File, Edit, Source, Refactor, Navigate, Search, Project, Run, Window, and Help (see Figure 1-9). Additional menus may also be present depending on which add-on tools you have loaded or which perspectives and views you are using.
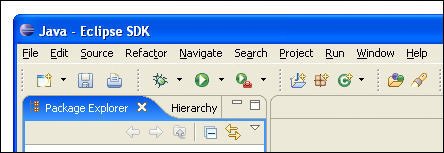
Figure 1-9. The Java perspective menu bar and toolbar.
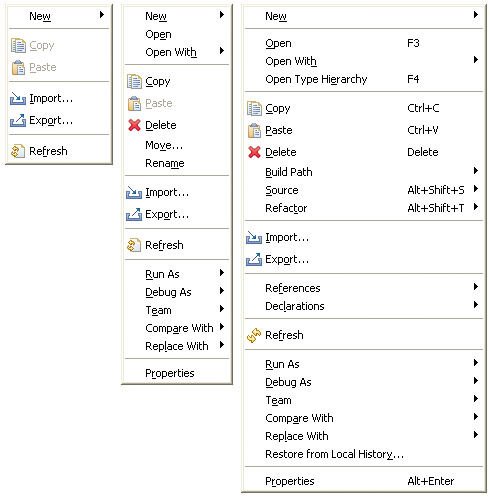
1.2.2.2. Context menusRight-clicking on any view or editor (except on the title bar) will reveal a context-sensitive popup menu. The contents of the menu depend not only on the view or editor that was clicked on, but also on the resources that were selected at the time. For example, Figure 1-10 shows three sample context menus. Figure 1-10. Context menus.
The first sample is the context menu from the Navigator view when nothing is selected, the second example is the same context menu when a Java file is selected in the Navigator view, and the third shows the context menu that appears when a Java file is selected in the Package Explorer view. Note that some options, such as the Refactor submenu, only appear in certain views under the right circumstances. 1.2.2.3. ToolbarsMuch like the context menus that appear when right-clicking in a view, the toolbar items that appear are context-sensitive depending on which perspective is in use and which editor has focus. Standard, common items appear first on the toolbar, with any editor-specific items at the end. When using the Resource perspective, the standard toolbar items visible by default include icons for creating new files, saving and printing resources, running external tools, accessing the search functions, and navigating recently accessed resources in browser style (see Figure 1-11). Figure 1-11. The Resource perspective menu bar and toolbar.
Switching to the Java perspective (see Figure 1-9) causes several new icons to appear for running or debugging your Java applications and for creating new Java projects, packages, and files. 1.2.2.4. Customizing available actionsYou do have some limited control over which items appear on the toolbar and on the main menu bar. Many commands are part of command groups known as action sets that can be selectively enabled and disabled using the Customize Perspective dialog. To customize the current perspective, select the Window > Customize Perspective... command, which opens the Customize Perspective dialog (see Figure 1-12). The toolbar and menu command groups are shown on the Commands page. Check the command groups you want to keep and uncheck all others. Use the Shortcuts page of the dialog to customize the entries on the New, Open Perspective, and Show View menus. Figure 1-12. Customize Perspective dialog.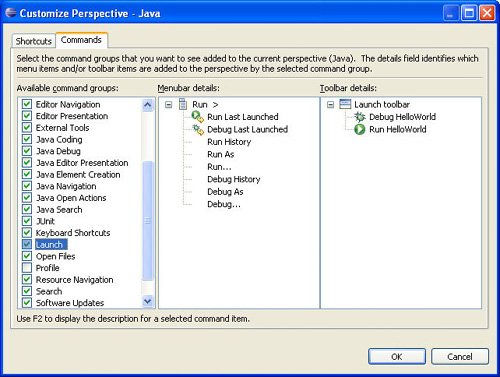
|