| [ Team LiB ] |
|
Packaging and Deployment IssuesPackaging and deploying resource adapters in WebLogic is a straightforward process. Packaging Resource AdaptersTo package a resource adapter into a .rar file, gather the classes or library files that contain the classes conforming to the J2EE Connector Architecture specification. Place those files in the root directory of the .rar file. Also place within the root directory any native libraries (Windows .dlls or Unix .so files) needed for the EIS system. Next, create a directory called META-INF in the root directory and place the ra.xml and weblogic-ra.xml files there. Refer to the "Configuring WebLogic J2EE-CA" section for help in creating these files. Then add any other required resources, such as images, readme files, or HTML help files, into or off of the root directory. The directory should look similar to this example, which shows an SAP RAR staging directory:
META-INF/
            ra.xml
            weblogic-ra.xml
sapjra.jar
sapjco.jar
sapjcorfc.dll
librfc32.dll
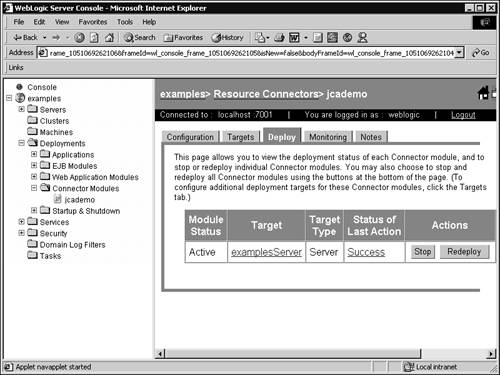
When these files are in place, create a RAR file in the root directory using the Java jar utility as shown in the following example: jar -cf <myresourceadapter>.rar * After the RAR file has been created, it's ready to be deployed within WebLogic Server. Deploying Resource AdaptersA resource adapter can be deployed either as a standalone connector or as part of an Enterprise Archive (EAR) file. If the resource adapter is deployed as a standalone connector, any application can access it. If it's deployed within an EAR file, only that application can access it. EAR File DeploymentTo deploy a resource adapter within an EAR file, place the RAR file within the EAR, just as you would place it in a Web archive (WAR) file or a JAR file. After the file is in the directory, the application.xml file must be modified to include the <connector> tag. <connector> is a new tag included in the J2EE 1.3 specification. If your application.xml file has a link to an older DTD, it will not work. Simply modify the older DTD declaration to a newer one found in the new specifications. The following is the sample entry in the application.xml file and includes the earliest DTD that will still work: <?xml version="1.0" encoding="UTF-8"?> <!DOCTYPE application PUBLIC '-//Sun Microsystems, Inc.//DTD J2EE Application 1.3//EN' 'http://java.sun.com/dtd/application_1_3.dtd'> <application> .... <module> <connector>myresourceadapter.rar</connector> </module> .... </application> When the file has been included in the EAR and the application.xml file has been updated, deploy the EAR file. The resource adapter will be available to only this application. RAR File DeploymentIt's also possible to deploy a RAR file so that all applications can access it. This is possible in a couple different ways. The first way is through the WebLogic console. The WebLogic console is found at http://url:port/console, where url is the location of WebLogic Server and port is the port that WebLogic is configured for. The console login screen will display, and after entering the username and password, you should see the WebLogic Server home page. On the left side of the screen, you should see the domains configured for this server. Inside the domain link is a node called Deployments, and under this link is another node called Connector Modules. If you click on Connector Modules, the right side of the screen will display all the current connectors, with a link labeled Deploy a New Connector Module. Clicking on this link starts a wizard to deploy or upload a connector module. The first step is to point to the .rar file or the directory under which the META-INF/ra.xml and associated files are located. When the files have been located, click on the Target Module button. The next screen enables you to change the name to identify the connector module. After everything is correct, simply click Deploy to deploy the resource adapter. The adapter is now listed in the navigation tree on the right side of the screen, as shown in Figure 31.6. Figure 31.6. WebLogic Console resource connector deployment.
WebLogic also comes with a command-line utility called weblogic.Deployer. This tool enables you to deploy, redeploy, remove, and deactivate a connector. The following is a simple command to deploy a RAR file on a local instance of WebLogic Server: java weblogic.Deployer -username weblogic -password weblogic-deploy myresourceadapter.rar Note that the preceding line assumes a default WebLogic installation on http://localhost:7001. If your implementation is different, please adjust the tool appropriately by reading the instructions. For more information about weblogic.Deployer, look at this site: http://e-docs.bea.com/wls/docs81/deployment/tools.html. |
| [ Team LiB ] |
|