| [ Team LiB ] |
|
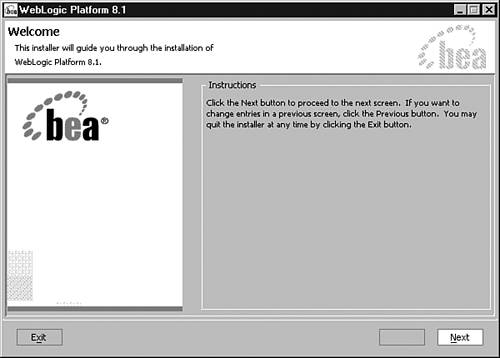
Windows InstallInstalling WebLogic Server is a straightforward process. There are two installation options for Windows: Graphical mode (Java-based GUI interactive execution) and Silent mode (noninteractive command prompt execution). To begin, you must get the executable (platform8x_win32.exe or server810_win32.exe) from either the BEA-provided CD-ROM or download the file from the BEA downloads area at http://bea.com. Our example assumes that you're installing the server from the platform distribution. To ensure that you have the most current version of the software, downloading the executable is the preferred means of attaining the software. The WebLogic Server installation program will create many folders. Table 2.1 will familiarize you with the end result WebLogic directory structure prior to beginning your installation. System RequirementsPrior to installation, ensure that you have sufficient disk space. The Windows install might require as much as 405MB. Additionally, the installer program requires 312MB in a temporary directory. This is a separate requirement from the 405MB, yielding a total of up to 717MB required to install the WebLogic Platform. A WebLogic Serveronly installation requires at least 550MB. The temp directory defaults to c:\temp. You'll be prompted to change this directory if your C: drive does not have sufficient disk space available. For detailed system (platform and software) requirements, refer to the BEA documentation site at http://edocs.beasys.com. Running platform8xx_win32.exeGraphical ModeAfter you've attained the software (approximately 300MB), run the executable to initiate the installation process as detailed later. If you have sufficient disk space, a welcome screen will be displayed as shown in Figure 2.1. Figure 2.1. WebLogic Server 8 welcome screen.
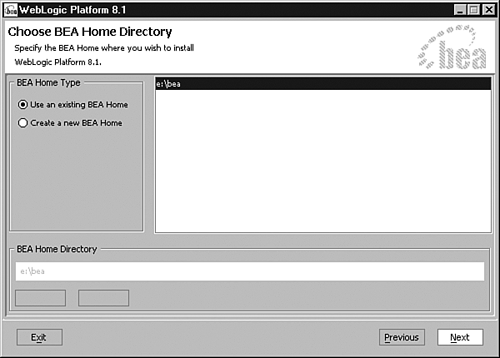
Continue negotiating through screens until you come to the BEA Home Directory screen. The BEA home directory will contain BEA common files, such as the JDK certified for use with this particular server release (JDK 1.4.1_02 for 8.1), WebLogic Server license, and other BEA utilities. Multiple BEA products deployed on the same box may use the one BEA home directory; that is, a WebLogic 8 series server can be deployed within a BEA home directory that hosts a WebLogic 7 or 6 series server. Earlier WebLogic Server versions (5 series and earlier) would not be deployed under this BEA home directory structure. If this is an initial installation, accept the default of Create a New BEA Home as shown in Figure 2.2. Figure 2.2. Creating a new BEA home directory.
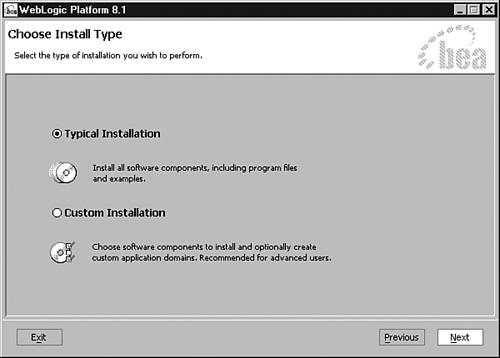
If the BEA home directory exists, select Use an Existing BEA Home. Both selections bring you to the Choose Install Type Screen. Selecting a typical install, as shown in Figure 2.3, will install the complete WebLogic Platform. To install only WebLogic Server, select Custom Install. For now, let's look quickly at a typical installation. The custom installation option is discussed later within this section. Figure 2.3. Selecting a typical WebLogic Platform installation.
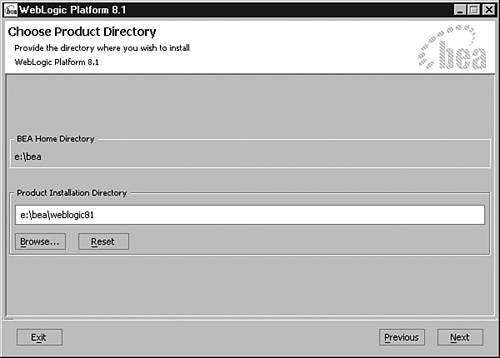
Typical WebLogic Platform InstallationSelecting a typical install yields a default WebLogic Server install. This default install deploys all WebLogic Platform components (including WebLogic Server) with samples. There are no default mydomain or myserver server deployments, as was the case under WebLogic 6 series and earlier WebLogic Server installations. However, you can find functional server deployments with associated configuration files within ../bea/weblogic8x/samples/domains/. Following the selection of a typical installation, the next screen is Choose Product Directory. Here you select your WebLogic Platform deployment directory. The default directory name is WebLogic8x, as shown in Figure 2.4. This directory may be located anywhere on your system. There is no constraint or requirement that this directory be located under the BEA home directory. Figure 2.4. Accepting the WebLogic default production directory name.
The file copy routine now initiates; it terminates with an Install Complete screen. Custom WebLogic 8 InstallationTo install WebLogic Server only, you must select Custom Installation on the Choose Install Type screen shown earlier in Figure 2.3. Selecting a custom installation gives you the option to specify which platform components to install, as shown in Figure 2.5. If you intend to install WebLogic Server, this is where you have the option of installing the functional samples that are included with the download. Figure 2.5. Choosing WebLogic Platform components for installation.
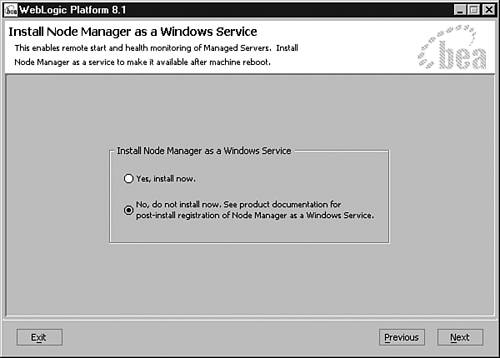
The next step in the custom installation process is to choose a production directory (the actual location of your WebLogic Server deployment) as you did earlier for the typical WebLogic installation. As before, you have the option to specify the location and name of this directory, as shown in Figure 2.4. Just as with the typical installation, there's no requirement in a custom installation to locate the production directory under the BEA home directory. The next screen prompts whether to install WebLogic Node Manager as a Windows service, as shown in Figure 2.6. Figure 2.6. Installing Node Manager as a Windows service.
At this point within the custom installation process, assuming that you installed the server samples, you have two functional WebLogic domains (servers): examples and medrec. These domains are located under ../bea/weblogic8x/samples/domains/. Now you have the option of running the WebLogic Configuration Wizard to configure your custom domain, as shown in Figure 2.7. Simply check the Run the Configuration Wizard box to create an application domain. You may also install XML Spy from this window, as shown in Figure 2.7. XML Spy is an XML editing/development environment. For more information about this application, refer to the product's Web site at http://www.xmlspy.com. Figure 2.7. Opting to Run the WebLogic Domain Configuration Wizard.
Skipping the Configuration Wizard initiates a default WebLogic install using either your specified WebLogic production directory name or the default production directory name as mentioned in the earlier discussion of a typical WebLogic 8 installation. WebLogic Domains and the Domain Configuration WizardA WebLogic domain is a related set of servers. A server is an instance of WebLogic Server where applications must run. There are various types of servers:
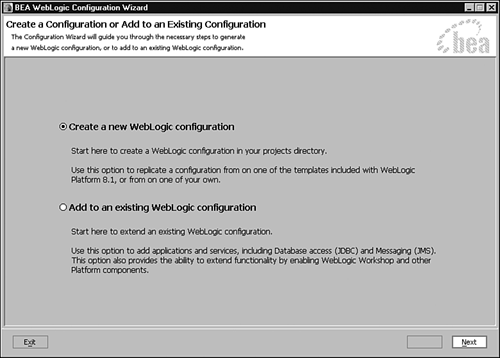
A single WebLogic domain may therefore contain one or more servers and zero to more WebLogic clusters. The Domain Configuration Wizard is a Java application that assists you in configuring the WebLogic domain to your specifications. After you've selected the option to run the Configuration Wizard, you must specify whether to create a new domain configuration or add elements to an existing domain. For example, let's create a new domain as shown in Figure 2.8. Figure 2.8. Creating a domain configuration.
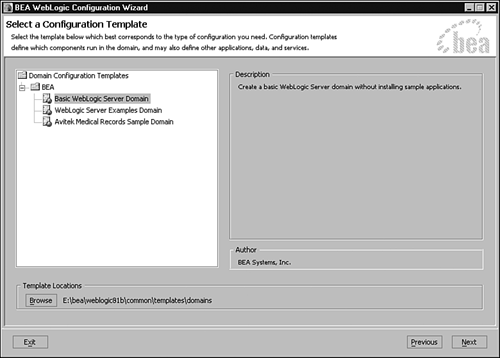
You must specify a domain name and the domain template to use as shown in Figure 2.9. The templates specify which canned WebLogic Server installation to deploy. Three templates are provided with your WebLogic Platform distribution. The WebLogic Server Examples and Avitek Medical Records Sample Domains create copies of the WebLogic Server Samples and Medrec applications, which are installed by default under a typical installation. The Basic WebLogic Server Domain template provides you a blank WebLogic Server domain without the samples. The selected domain name will be the directory name under which your servers will be deployed. Figure 2.9. Selecting a domain template.
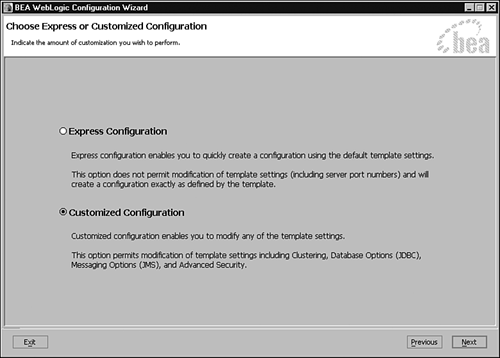
NOTE Other BEA templates might be available within this window depending on your past BEA installations. The next screen, shown in Figure 2.10, enables you to select the level of configuration. The Express Configuration option allows the adoption of preexisting domain configurations without modification. In contrast, the Custom Configuration option configures the specific character of servers within your domain; that is, whether your domain has a single server, an administration server with managed servers, an administration server with clustered managed servers, or a managed server under an existing administration server, along with individual server configuration parameters. Figure 2.10. Selecting the level of domain configuration.
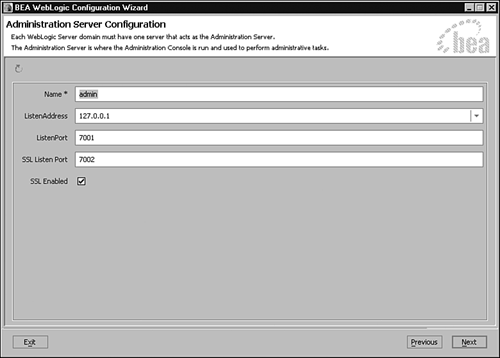
Your domain must include at least one administration server that is configured first, as shown in Figure 2.11. If you're running only one WebLogic Server, this server must be an administration server that may host applications. Our example will configure a single server. Other options are
Figure 2.11. Configuring the administration server.
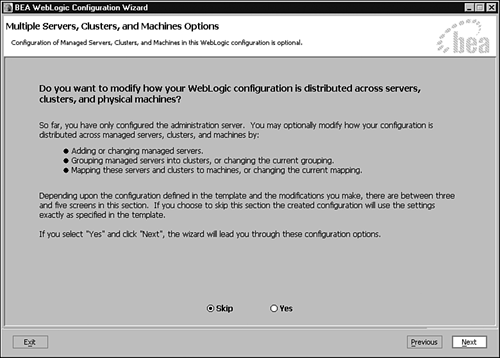
Regardless of the options selected, you must configure each individual server, as shown in Figure 2.11. The Server Name value is a unique server name within your domain; that is, you cannot have two servers with the same name within one domain. The Server Listen Address value is the unique IP address associated with this server. Listen Port numbers are integers in the range of 1 to 65535, but are typically four digits. The default values for Listen Address and Port are displayed in Figure 2.11. CAUTION For security reasons, you may choose not to use these default values for your custom server configurations, especially within a production environment. The next screen enables you to install managed servers, clusters, or alter the current server to machine mapping. If you're installing a single server, select Skip as shown in Figure 2.12. Figure 2.12. Installing multiple machines and clusters or altering machine options.
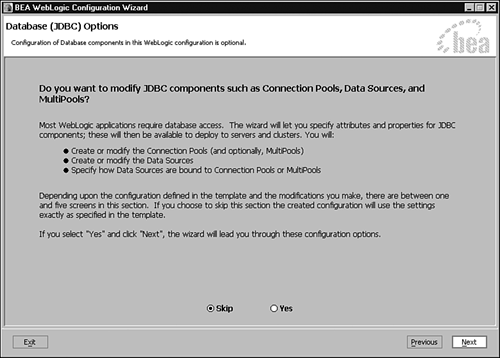
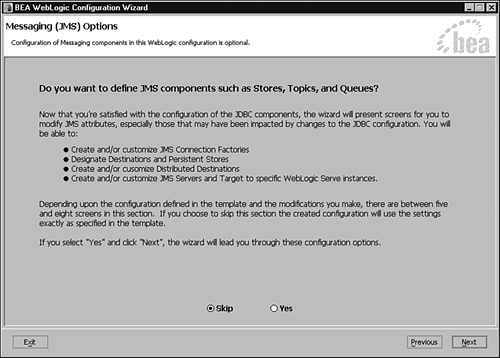
The following screens enable you to configure JDBC, JMS, and Advanced Security options, as shown in Figures 2.132.15. Figure 2.13. Configuring JDBC options.
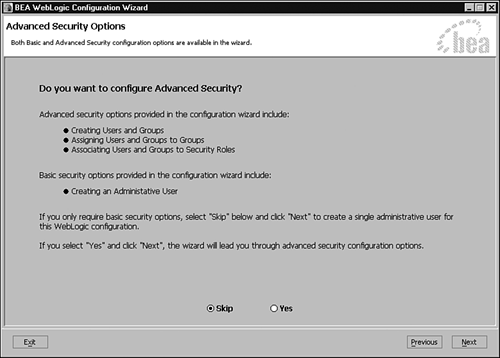
Figure 2.15. Configuring advanced security options.
Figure 2.14. Configuring JMS options.
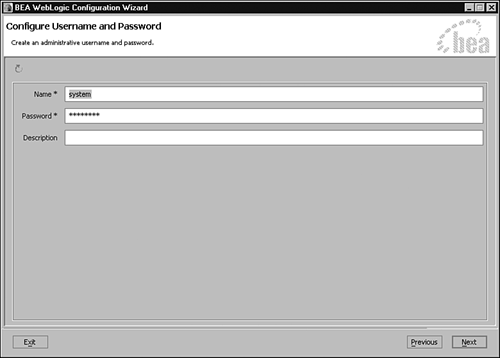
After configuring servers within your domain, you must set the administrative username and password as shown in Figure 2.16. This username and password are needed to boot your server, connect to the administration server, and to access the WebLogic Console. After entering the information and selecting Next, you'll be prompted to confirm the password entered. Figure 2.16. Designating system username/password.
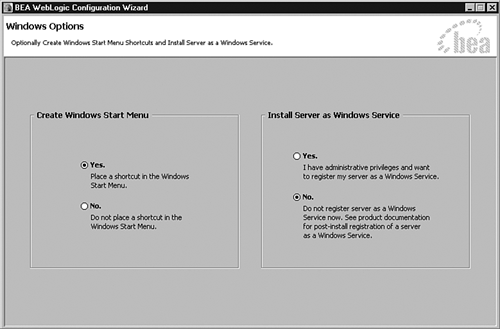
CAUTION The use of commonly used terms such as system, admin, administrator, root, WebLogic, and so on for username/password may compromise your server's security. Use uncommon usernames and passwords to further promote server security, especially within a production environment. Next you're prompted to link your administration server's start script to your Windows Start menu. We'll do so. Lastly we're asked to install our WebLogic administration server (and associated domain) as a Windows service (our example does not select this option), as shown in Figure 2.17. This option will start your server at boot time. You must have administrator rights on your system to set up this option. Figure 2.17. Including the Admin server in the Windows Start menu, and installing our domain as a Windows service.
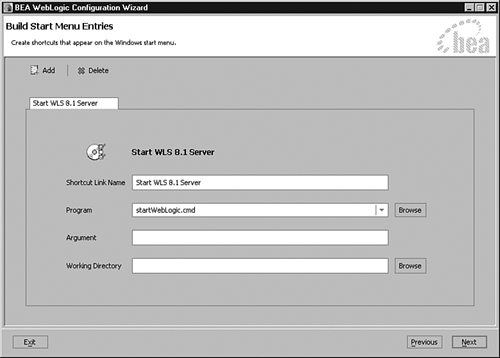
The next screen displays WebLogic shortcuts to be included in the Windows Start menu, as shown in Figure 2.18. There is one tab per shortcut in this dialog. The figure shows a single shortcut. You may delete unwanted shortcuts or add needed items. Figure 2.18. WebLogic Server shortcuts.
The next screen requires you to select the JDK to use and to specify the configuration environment as either development or production, as shown in Figure 2.19. Choose the Sun SDK and development mode. Figure 2.19. Selecting configuration environment and JDK.
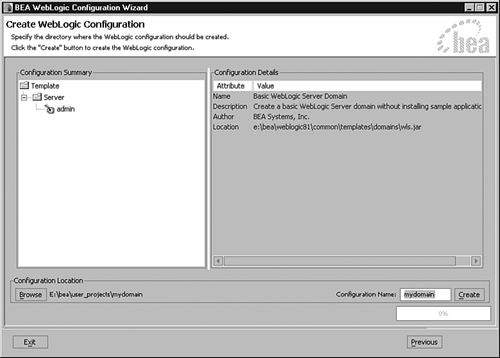
The next screen displays a summary of your domain configuration selections, along with a prompt to create the domain at a specified location, as shown in Figure 2.20. As mentioned earlier, there's no requirement to locate the domain within BEA home directory, but we'll create our sample domain in the default location. Click the Create button to continue. Figure 2.20. Specifying the domain location and creating the domain.
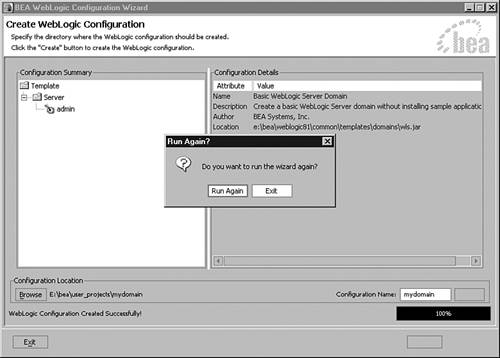
After creating the domain and selecting Done, you have the option to run the Configuration Wizard again, as shown in Figure 2.21. Figure 2.21. Terminating the Configuration Wizard.
If no further domain configurations are required, the custom installation process terminates. The Configuration Wizard can be initiated directly from Windows by executing the command script at ..\bea\weblogic8x\common\bin\config.cmd. CAUTION If you encounter problems running a command script such as config.cmd or startWebLogic.cmd, inspect the script for correct paths for JDK, BEA home, and so forth. Running WebLogic8xx_win32.exeSilent ModeThe second method of installing WebLogic Server is the Silent mode. This entails passing an XML file, silent.xml, whose code sample is shown in Listing 2.1, as a parameter to the WebLogic executable. Silent mode installation is usually employed for a typical installation. In that case, only three parameters (BEA home, platform install directory, and whether to install Node Manager as a Windows service) are required, as shown in Listing 2.1. If additional configuration is desired for a silent installation, the Configuration Wizard can also be run in Silent mode. You need only execute the two commands within the same command script. For further information on running the Configuration Wizard within Silent mode, refer to http://e-docs.bea.com/platform/docs81/confgwiz/. Listing 2.1 Silent.xml Provided by BEA<?xml version="1.0" encoding="UTF-8"?> <!-- Silent installer option: -mode=silent -silent_xml=/home/me/silent.xml --> <domain-template-descriptor> <input-fields> <data-value name="BEAHOME" value="C:\bea" /> <data-value name="USER_INSTALL_DIR" value="C:\bea\weblogic81" /> <data-value name="INSTALL_NODE_MANAGER_SERVICE" value="no" /> </input-fields> </domain-template-descriptor> CAUTION XML syntax must be correct. The first line of the XML file must be as shown in Listing 2.1, without any preceding spaces or blank lines. The Silent mode installer does not conduct any XML verification checks, the install merely fails. The command weblogic8x_win32.exe -mode=silent -silent_xml=d:\temp\silent.xml -log=d:\temp\logs\install.log installs the WebLogic Platform using the configuration parameters located within the file d:\temp\silent.xml. An audit of the installation will be logged to file d:\temp\logs\install.log. Note that absolute filenames are required for XML and the log file. The mode and silent_xml options are required, but the log option is optional. The silent mode installation is not interactive. However, a processing screen is displayed. The Done reported at the conclusion of the silent installation does not signify a successful installation. Conditions produced by incorrect parameters, insufficient system resources, or other issues will cause the installation to fail. You must vigorously investigate the installation log to identify these concerns. Additionally, the log file folder (d:\temp\logs in our example) must exist prior to initiating the silent mode installation. The silent mode installation process will not create the log file if its parent directory is nonexistent (the installation will fail without the benefit of an install log). The silent mode might not be your best option for installing the WebLogic Platform. |
| [ Team LiB ] |
|