Setting Up a Network PrinterYou use the vendor's software to configure the operating system of a network printer. After you have completed the vendor software installation, you don't need additional configuration. You must obtain this vendor software from the printer manufacturer and then install the printer on your system. Most network printers are easy to configure. The HP JetDirect print server is the most popular, but it is by no means the only print server available. The first step in setting up the printer software is to connect the print server to the network and set its IP address and other network configuration settings. This process varies from one print server to another, so you need to follow the manufacturer's guidelines for information on how to do this. Next, you need to install the print server software and follow the manufacturer's guidelines for configuring the printer. The vendor's software configures everything; usually no additional software configuration is required. Caution Be Careful Using Print Manager to Add a Network Printer Unless a printer uses the lpd protocol, you should not use Print Manager to add, modify, or delete a network-based printer that is connected directly to a network with its own network interface card. You won't damage anything if you try this, but your printer will not be recognized by the system, even though the printer might appear in the printer tool window. You should always use the manufacturer-supplied software to manage the printer. For printers that have parallel or serial connections, you must use the Solaris tools to configure the operating system to recognize the printer. BSD Versus SVR4 Printing SoftwareThe BSD Unix and SVR4 Unix are similar and yet different when it comes to the software that drives the Unix printing process. The two print systems are similar in that both are based on the concept of spooling. Both SVR4 and BSD print services support the concept of an interface program, which acts as a filter through which all output sent to the printer is passed. The following are examples of the uses of interface programs:
The differences between BSD and SVR4 are in the configuration files and the spooling directories, which the Solaris operating environment configures automatically. Differences also exist in the way the lpsched daemon handles print jobs as compared to the way the lpd daemon handles them in BSD. SVR4 Print ServiceIn SVR4, one lpsched daemon services all printers. The lpsched daemon is continually running, and it provides the power for the print service. Only one instance of lpsched should be running at any time. The LP print service performs the following functions:
Most of the lp configuration files are located in the /var/spool/lp directory, except for the interface files, which are located in the /etc/lp/interfaces directory. A SCHEDLOCK file should be in /var/spool/lp; it is responsible for ensuring that only one instance of lpsched runs. You use the lpadmin command to add, configure, and delete printers from the system. Information about printers can be found in the /etc/printers.conf file and in files located in the /etc/lp directory. Solaris Print Manager provides a graphical interface to many of the lp commands listed in Table 6.2.
Although Solaris uses the SVR4 print model, it still supports BSD-style printing to provide interoperability. The widely used BSD printing protocol provides compatibility between different types of Unix and non-Unix systems from various manufacturers. Print Servers Versus Print ClientsA print server is a system that has a local printer connected to it and makes the printer available to other systems on the network. A print client is a remote system that can send print requests to a print server. A system becomes a print client when you install the print client software and enable access to remote printers on the system. Any networked Solaris system with a printer can be a print server, as long as the system has adequate resources to manage the printing load. The print client issues print commands that allow it to initiate print requests. The print command locates a printer and printer configuration information. When a print job is sent from the print client, the user issues either the SVR4-style lp command or the BSD-style lpr command. Any one of the styles shown in Table 6.3 can be used to submit a print request.
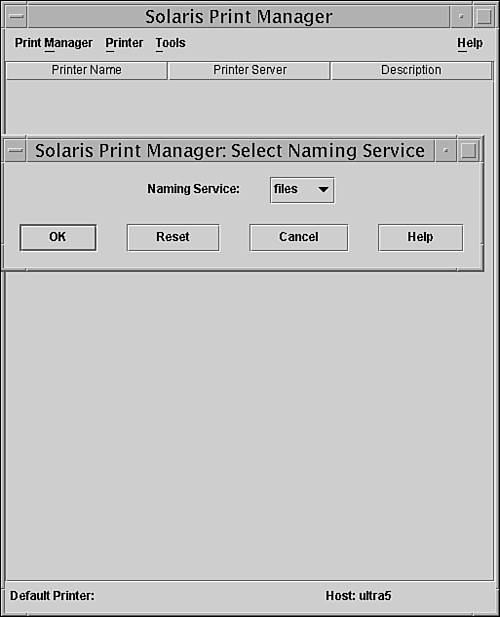
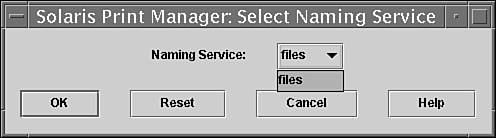
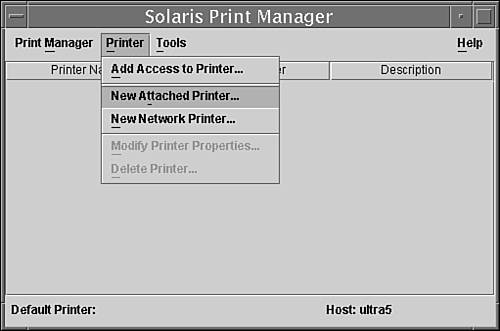
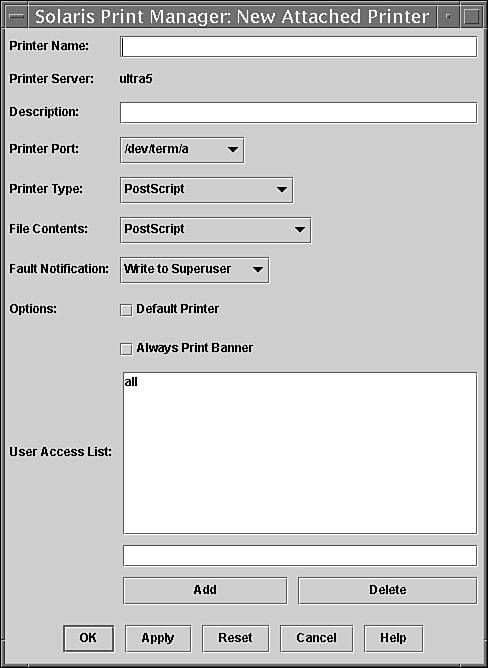
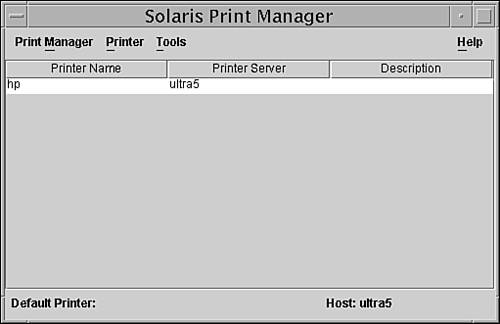
If the user doesn't specify a printer name or class in a valid style, the command follows the search order defined in the /etc/nsswitch.conf file. By default, the command checks the user's PRINTER or LPDEST environment variable for a default printer name. These variables can be set in the user's startup file to specify a default printer to use. If neither environment variable for the default printer is defined, the command checks the .printers file in the user's home directory for the default printer alias. If the command does not find a default printer alias in the .printers file, it then checks the print client's /etc/printers.conf file for configuration information. If the printer is not found in the /etc/printers.conf file, the command checks the name service (NIS or NIS+), if any. Configuring Software for a Solaris PrinterThe print client software and the Print Manager application offer a graphical solution for setting up and managing printers in a networked environment. Print Manager provides a graphical interface to the lp commands listed in Table 6.2. The advantage of the Solaris Print Manager software is that it supports a name service (NIS or NIS+) that lets you centralize print administration for a network. If you're using a name service, Solaris Print Manager is the preferred method for managing printer configuration information. Using a name service for storing printer configuration information is desirable because it makes printer information available to all systems on the network, and that makes printing administration easier. The two tools are similar to one another and require the same type of information. You can also use the lpadmin command at the command line to configure printers on individual systems. The next few sections describe how to set up a printer by using Print Manager and the command line. Setting Up a Printer by Using Print ManagerSolaris Print Manager is a Java-based GUI that enables you to manage local and remote printer configuration. As with any Solaris GUI, your terminal must be able to display the X11 window environment in order to use this tool and you must be logged in as root. You can follow the procedure in Step by Step 6.1 to set up a printer by using the Printer Manager.
Using a Printer Not Listed on the Printer Types MenuPrinter types listed in the Print Manager window correspond to printers listed in the /usr/share/lib/terminfo directory. If a printer type is not available for the type of printer you are adding, you might need to add an entry in the /usr/share/lib/terminfo database. Each printer is identified in the terminfo database by a short name; for example, an HP LaserJet printer is listed under the /usr/share/lib/terminfo/h directory as HPLaserJet. The entries for PostScript printers are in /usr/share/lib/terminfo/P. The name found in the directory is the printer type you specify when setting up a printer. If you cannot find a terminfo entry for your printer, you can try selecting a similar type of printer; however, you might have trouble keeping the printer set in the correct modes for each print request. If no terminfo entry exists for your type of printer and you want to keep the printer set in the correct modes, you can either customize the interface program used with the printer or add an entry to the terminfo database. You'll find the printer interface program located in the /etc/lp/interfaces directory. Editing an interface file or adding an entry to the terminfo database is beyond the scope of this book. A printer entry in the terminfo database contains and defines hundreds of items. Refer to the Solaris System Administration Guide: Advanced Administration at http://docs.sun.com for information on performing this task. Another good reference for this topic is John Strang and Tim O'Reilly's book termcap & terminfo, published by O'Reilly & Associates, Inc. Setting Up a Printer by Using the lpadmin CommandIf you are unable to use Print Manager, you can add a printer directly from the command line by using the lpadmin command. This method of setting up a printer provides the most flexibility, so if you're comfortable with using the command line, you should use it. The lpadmin command enables you to do the following:
By using lpadmin, you can set all the print definitions, whereas Solaris Print Manager allows you to set only some of them when you install or modify a printer. Before you use the lpadmin command to add a printer, you first need to gather the following information about the printer you are going to set up:
To set up a printer that is connected to the parallel port on a Sun Ultra system from the command line, you follow the procedure in Step by Step 6.2. You now know how to set up a printer by using the command line. Next you'll learn how to manage printers by using the lpadmin command. |