| [ Team LiB ] |
|
Volume ManagementStarting with the Solaris 2.2 system software, volume management automates mounting of CD-ROMs and diskettes; users no longer need to have superuser permissions to mount a CD-ROM or a diskette.
CAUTION. The Solaris 2.0 and 2.1 procedures for mounting CD-ROMs and diskettes do not work for Solaris 2.2 and later releases. Volume management controls the /dev/dsk/c0t6d0s2 path to a CD-ROM drive and the /dev/diskette path to the diskette drive. If you try to access a CD-ROM or diskette and specify these paths, an error message is displayed. Volume management provides users with a standard interface for dealing with diskettes and CD-ROMs. Volume management provides three major benefits.
Mounting devices manually requires the following steps.
Using volume management requires the following steps.
Volume Management FilesVolume management consists of the /usr/sbin/vold volume management daemon, the /etc/vold.conf configuration file used by the vold daemon to determine which devices to manage, the /etc/rmmount.conf file used to configure removable media mounts, and actions in /usr/lib/rmmount. The volume daemon logs messages in the /var/adm/vold.log file. The default /etc/vold.conf file is shown below. # ident "@(#)vold.conf 1.26 00/07/17 SMI" # # Volume Daemon Configuration file # # Database to use (must be first) db db_mem.so # Labels supported label cdrom label_cdrom.so cdrom label dos label_dos.so floppy rmdisk pcmem label sun label_sun.so floppy rmdisk pcmem # Devices to use use cdrom drive /dev/rdsk/c*s2 dev_cdrom.so cdrom%d use floppy drive /dev/rdiskette[0-9] dev_floppy.so floppy%d use pcmem drive /dev/rdsk/c*s2 dev_pcmem.so pcmem%d forceload=true use rmdisk drive /dev/rdsk/c*s2 dev_rmdisk.so rmdisk%d # Actions eject dev/diskette[0-9]/* user=root /usr/sbin/rmmount eject dev/dsk/* user=root /usr/sbin/rmmount insert dev/diskette[0-9]/* user=root /usr/sbin/rmmount insert dev/dsk/* user=root /usr/sbin/rmmount notify rdsk/* group=tty user=root /usr/lib/vold/volmissing -p remount dev/diskette[0-9]/* user=root /usr/sbin/rmmount remount dev/dsk/* user=root /usr/sbin/rmmount # List of file system types unsafe to eject unsafe ufs hsfs pcfs udfs If a system has additional diskette drives, volume management automatically creates two subdirectories in /vol/dev for each additional driveone to provide access to the file systems and the other to provide access to the raw device. For a second diskette drive, volume management creates directories named diskette1 and rdiskette1. For a third diskette drive, it creates directories named diskette2 and rdiskette2 (and so on for additional drives). The syntax for a Devices to use entry is shown below.
use device type special shared-object symname options
Volume management does not automatically mount DVD devices. Table 66 describes each of the fields for the Devices to use syntax.
The /etc/rmmount.conf file is shown below. # ident "@(#)rmmount.conf 1.12 00/08/29 SMI" # # Removable Media Mounter configuration file. # # File system identification ident udfs ident_udfs.so cdrom floppy rmdisk ident hsfs ident_hsfs.so cdrom ident ufs ident_ufs.so cdrom floppy rmdisk pcmem ident pcfs ident_pcfs.so floppy rmdisk pcmem # Actions action cdrom action_filemgr.so action floppy action_filemgr.so action rmdisk action_filemgr.so # Mount mount * hsfs udfs ufs -o nosuid The files in the /usr/lib/vold directory are listed below.
castle% ls -1 /usr/lib/vold
db_mem.so.1
db_nis.so.1
dev_cdrom.so.1
dev_cdtest.so.1
dev_floppy.so.1
dev_pcmem.so.1
dev_rmdisk.so.1
dev_test.so.1
eject_popup
label_cdrom.so.1
label_dos.so.1
label_sun.so.1
label_test.so.1
volcancel
volmissing
volmissing_popup
volstat
castle%
The files in the /usr/lib/rmmount directory are listed below.
oak% ls -1 /usr/lib/rmmount
action dvdvideo.so.1
action_filemgr.so.1
action_workman.so.1
oak%
If you encounter problems with volume management, check the /var/adm/vold.log file for information. An example of this file is shown below.
oak% more /var/adm/vold.log
Tue Jun  1 17:34:24 1999 warning: dev_use: couldn't find a driver for drive
 cdrom at /dev/dsk/c0t6
Tue Jun  1 17:39:12 1999 warning: dev_use: couldn't find a driver for drive
 cdrom at /dev/dsk/c0t6
Tue Jun  1 18:24:24 1999 warning: dev_use: couldn't find a driver for drive
 cdrom at /dev/dsk/c0t6
Wed Jun 23 15:08:47 1999 warning: check device 36.2: device not managed
Wed Jun 23 15:09:58 1999 warning: check device 36.2: device not managed
Wed Jun 23 15:11:08 1999 warning: check device 36.2: device not managed
Thu Jul 15 13:51:23 1999 warning: check device 36.2: device not managed
Thu Jul 15 13:52:53 1999 warning: check device 36.2: device not managed
Thu Jul 15 14:04:37 1999 warning: check device 36.2: device not managed
Thu Jul 15 14:05:52 1999 warning: check device 36.2: device not managed
Thu Jul 15 14:06:16 1999 warning: check device 36.2: device not managed
Wed Jul 21 16:33:33 1999 fatal: svc_tli_create: Cannot create server handle
Thu Jul 22 16:32:28 1999 warning: cdrom: /dev/rdsk/c0t6d0s2; Device busy
castle%
If you want to display debugging messages from the volume management daemon, you can start the daemon by typing /usr/sbin/vold -v -L 10. With these flags set, the volume management daemon logs quite a bit of information in /var/adm/vold.log. Another way to gather debugging information is to run the rmmount command with the debug flag. To do so, edit /etc/vold.conf and change the lines with /usr/sbin/rmmount in them to include the -D flag, as shown in the following example. insert dev/diskette[0-9]/* user=root /usr/sbin/rmmount -D Volume Management Mount Points
When you insert a diskette in the diskette drive, you must ask the system to check the diskette drive. You can check for a diskette in any one of the following ways.
When you use any of these methods, the files are mounted on the /floppy mount point. Table 67 describes the mount points and how volume management uses them.
If the medium does not contain a file system, volume management provides block and character devices in the /vol file system, as shown in Table 68.
Limitation on UFS Formats with Volume Management for CDsUFS formats are not portable between architectures, so you must use them on the architecture for which they were formatted. For example, a UFS CD formatted for a SPARC platform cannot be recognized by an IA platform. Likewise, an IA UFS CD cannot be mounted by volume management on a SPARC platform. The same limitation applies to diskettes. Most CDs are formatted according to the ISO 9660 standard (High Sierra File SystemHSFS), which imposes no limitations on volume management. CD-ROMs and Volume ManagementThe following sections describe how to access files from local and remote CD-ROM drives. Mounting a Local CD-ROMUse the following procedure to mount a CD-ROM from a local drive.
You can use the File Manager CD-ROM window and the command line interchangeably. For example, you can eject a CD-ROM either from a command line by typing eject cdrom or by choosing Eject from the File menu in the File Manager CD-ROM window. Sharing Local Media Drives with NFS
Use the following steps to make available local media devices.
The following example makes a local CD available to other systems on the network when the nfsd daemon is not running. # ps -ef | grep nfsd # # mkdir /dummy # vi /etc/dfs/dfstab (Add the following line:). share -F nfs -o ro /dummy # eject /cdrom/cdrom0 # chmod 644 /etc/rmmount.conf # vi /etc/rmmount.conf (Add the following line to the FIle System Sharing section) share cdrom* # chmod 444 /etc/rmmount.conf # /etc/init.d/nfs.server start # ps -ef | grep nfsd root 577 1 0 10:51:55 ? 0:00 /usr/lib/nfs/nfsd # share - /dummy ro "" # The following example uses the ps command to verify that the mountd daemon is not already running, and if you are superuser, it runs the S15nfs.server script to stop NFS services and restart them. oak% ps -ef | grep mountd root 4571 4473 5 12:53:51 pts/3 0:00 grep mountd oak% su Password: # /etc/rc3.d/S15nfs.server stop # /etc/rc3.d/S15nfs.server start # How to Access an NFS-Shared CD-ROM File SystemYou can use the /mnt directory as the mount point for the CD-ROM files, or you can create another directory.
NOTE. Do not use the /cdrom mount point to mount NFS file systems. Volume management may interfere with accessing files on the volume management /cdrom mount point. When the CD-ROM is in the remote drive and the files are shared by NFS, use the following steps to access the shared files on a local system.
The following example mounts the files from the remote system castle on the /mnt mount point. oak% su Password: # mount -F nfs -o ro castle:/cdrom/cdrom0 /mnt # cd /mnt # ls SUNWssser SUNWsssra SUNWsssrb SUNWsssrc SUNWsssrd SUNWssstr # How to Unmount an NFS-Shared CD-ROM File SystemWhen you are through using the CD-ROM files, use the following steps to unmount the remote CD-ROM file system.
How to Find Out If an NFS-Mounted CD-ROM File System Is Still in UseIf a Device busy error message is displayed when you try to unmount a CD-ROM, you can use the fuser command to find out who is currently accessing the CD.
In the following example, user winsor is accessing the CD. paperbark% eject cdrom /vol/dev/rdsk/c0t6d0/s8ap_doc: Device busy paperbark% su Password: # fuser -u /cdrom/cdrom0 /cdrom/cdrom0: 467c(winsor) # fuser -u -k /cdrom/cdrom0 # eject cdrom # exit paperbark% Diskettes and Volume ManagementWhen you insert a diskette into the diskette drive, to prevent excessive reads, volume management does not mount the diskette automatically. Excessive reads can quickly wear out the diskette drive. You must use the volcheck command that checks for the presence of a diskette in the diskette drive. Limitation on UFS Formats with Volume Management for DiskettesUFS formats are not portable between architectures, so you must use them on the architecture for which they were formatted. For example, a UFS diskette formatted for a SPARC platform cannot be recognized by an IA platform. Likewise, an IA UFS diskette cannot be mounted by volume management on a SPARC platform. The same limitation applies to CDs. UFS incompatibility can occur more often with diskettes than with CDs because formats often can be established by the user. Be aware that if you format a UFS diskette on one architecture, you won't be able to use it on a different architecture. Command-Line Diskette Formatting (rmformat)The rmformat command, introduced in the Solaris 8 release, was buggy. The bugs in rmformat are fixed in the Solaris 9 release, and rmformat is preferred command for formatting removable media. Use the following steps to format a diskette from a command line with the rmformat command.
NOTE. If the diskette does not have a file system written on it, the volcheck command accesses the device. However, if the diskette already has a file system on it, you cannot use the volcheck command to mount the file system on the diskette. rmformat requires an unmounted diskette for formatting.
The following example formats a diskette on a system running volume management. mopoke% rmformat -F quick floppy0 Formatting will erase all the data on the disk. Do you want to continue? (y/n) y mopoke% Command-Line Diskette Formatting (fdformat)
Use the following steps to format a diskette from a command line with the fdformat command.
Use the following steps to access files on a formatted diskette.
In the following example, the diskette is not mounted, so the only directory in /floppy is ms-dos_5. After volcheck mounts the diskette, the directory with the name of the diskette is displayed. The diskette in this example contains only a lost+found directory. oak% cd /floppy oak% ls ms-dos_5 oak% volcheck oak% ls ms-dos_5 unnamed_floppy oak% cd unnamed_floppy oak% ls lost+found oak% cp /home/winsor/Appx/appxA.doc . oak% ls appxA.doc lost+found oak% Determining If a Diskette Is Still in UseYou cannot unmount a file system whose current working directory is in use. If you get the message Device busy, a process has its current working directory on the diskette. You can use the fuser command to find out who is currently accessing the diskette.
NOTE. On a SPARC platform, the diskette is physically ejected from its drive. On an IA platform, you have to eject the diskette by hand. If you are running on an IA platform, look for a message on screen that says you can now eject the diskette. If the diskette jams, eject it manually by inserting a straightened paper clip about an inch into the small hole in the front of the drive. Ejecting a DisketteUse the following steps to eject the diskette.
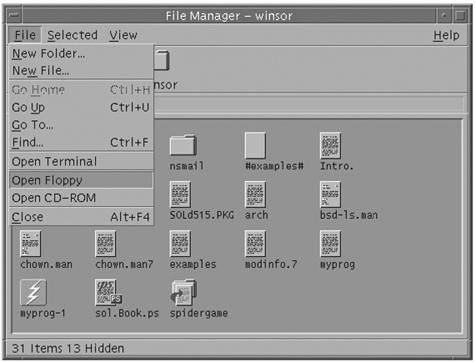
Accessing the CDE Front PanelIf you are running CDE, you can use the Folders menu on the front panel to display the contents of a diskette. Use the following steps to open a diskette from the front panel.
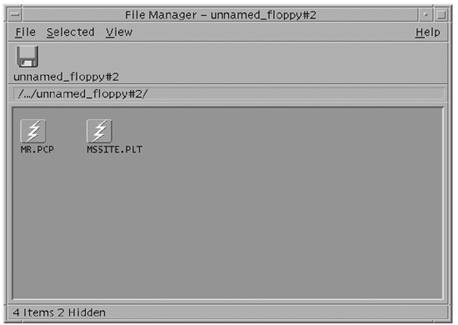
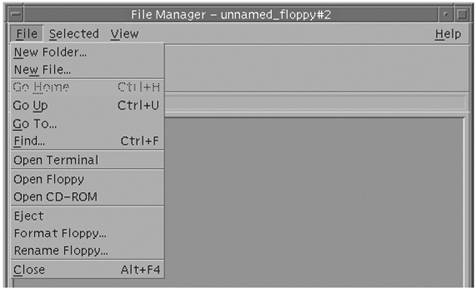
CDE File Manager AccessIf you are running CDE File Manager, you can use it to format a diskette, display the contents, and copy files to and from the diskette. Use the following steps to open a diskette from the CDE File Manager.
Using Removable Media Manager to Format DiskettesYou can use the Removable Media Manager graphical user interface to create the following formats and file systems on a diskette.
You can format an unformatted diskette or reformat a formatted diskette.
CAUTION. Reformatting a diskette destroys any existing data on the diskette. Use the following steps to format a diskette with Removable Media Manager.
Using the tar and cpio Commands with DiskettesIf a diskette contains a raw tar or cpio datastream, volume management does not mount it. You cannot access files on the diskette from the old /dev/rdiskette device name. You can access raw tar and cpio datastreams on a diskette by using the symbolic link to the character device for the media that is in floppy drive 0 with the following device name. /vol/dev/aliases/floppy0 Use the following steps to create a tar archive that contains a single file.
Use the following steps to copy all tar files from a diskette.
Alternatively, with Solaris 2.2 (and later) systems, you can access tar or cpio files by using the following device name syntax.
/vol/dev/rfd0/media-name
The most common media-name is unlabeled. With Solaris 2.3, the device name syntax is changed. You access tar or cpio files with the following device name syntax.
/vol/dev/rdiskette0/ media-name
The most frequent media-name for media without a file system is unlabeled. For example, to put files into a tar archive that is sent as a raw datastream to the raw diskette device, type tar cvf /vol/dev/rdiskette0/unlabeled filename and press Return. To read a raw tar archive datastream from the raw diskette device and extract the files it contains, type tar xvf /vol/dev/rdiskette0/unlabeled and press Return. Volume Management TroubleshootingFrom time to time, you may encounter problems with mounting diskettes (or, less frequently, a CD-ROM). If you encounter a problem, first check to find out whether volume management knows about the diskette. The best way to check is to look in /vol/dev/rdiskette0 to see if something is there. If the diskette device files don't exist, you may have forgotten to run the volcheck command or you may have a hardware problem. If references to /vol hang, the /usr/sbin/vold daemon has probably died, and you should restart it by typing /etc/init.d/volmgt start and pressing Return. If you find a name in /vol/dev/rdiskette0 and nothing is mounted in /floppy/ media-name, it is likely that the data on the medium is not a recognized file system. It may be a tar, cpio, or Macintosh file system. You can access these media through the block or character devices found in /vol/dev/rdiskette0 or /vol/dev/diskette0 and use your own tools to interpret the data on them. Volume Management and workmanMany people use the workman program to play music from their CD-ROM drive. workman is not a Sun product, but it is in wide use. To use workman with volume management, add the line shown in bold to the /etc/rmmount.conf file. Be sure the line comes before the cdrom action_filemgr line.
# ident "@(#)rmmount.conf     1.12         00/08/29 SMI"
#
# Removable Media Mounter configuration file.
#

# File system identification
ident udfs ident_udfs.so cdrom floppy rmdisk
ident hsfs ident_hsfs.so cdrom
ident ufs ident_ufs.so cdrom floppy rmdisk pcmem
ident pcfs ident_pcfs.so floppy rmdisk pcmem

# Actions
action cdrom action_workman.so pathname
action cdrom action_filemgr.so
action floppy action_filemgr.so
action rmdisk action_filemgr.so

# Mount
mount * hsfs udfs ufs -o nosuid
A pathname is the name of the path by which users access the workman programfor example, /usr/dist/exe/workman. When you have made this change, audio CD-ROMs are automatically detected and the workman program is started when an audio CD-ROM is inserted into the CD-ROM drive.
NOTE. When you set up workman in the way described here, you should not try to start workman from the application because volume management may become confused. In addition, with Solaris 2.2 (and later) volume management, if you are using workman, you must eject the CD-ROM from the workman application. If you eject the CD-ROM from another window, workman hangs. This problem is fixed in Solaris 2.3 and later system software. Disabling Volume ManagementYou may want to disable volume management for some users. To do so, use the following steps.
You can disable part of volume management and leave other parts functional. You may, for example, want to automatically mount CD-ROMs but use the Solaris 2.0 method for accessing files on a diskette. You can do so by commenting out the lines for diskettes in the /etc/vold.conf file, as shown below.
# ident     "@(#)vold.conf     1.26    00/07/17 SMI"
#
# Volume Daemon Configuration file
#

# Database to use (must be first)
db db_mem.so

# Labels supported
label cdrom label_cdrom.so cdrom
label dos label_dos.so floppy rmdisk pcmem
label sun label_sun.so floppy rmdisk pcmem

# Devices to use
use cdrom drive /dev/rdsk/c*s2 dev_cdrom.so cdrom%d
# use floppy drive /dev/rdiskette[0-9] dev_floppy.so floppy%d
use pcmem drive /dev/rdsk/c*s2 dev_pcmem.so pcmem%d forceload=true
use rmdisk drive /dev/rdsk/c*s2 dev_rmdisk.so rmdisk%d

# Actions
eject dev/diskette[0-9]/* user=root /usr/sbin/rmmount
eject dev/dsk/* user=root /usr/sbin/rmmount
insert dev/diskette[0-9]/* user=root /usr/sbin/rmmount
insert dev/dsk/* user=root /usr/sbin/rmmount
notify rdsk/* group=tty user=root /usr/lib/vold/volmissing -p
remount dev/diskette[0-9]/* user=root /usr/sbin/rmmount
remount dev/dsk/* user=root /usr/sbin/rmmount

# List of file system types unsafe to eject
unsafe ufs hsfs pcfs udfs
| |||||||||||||||||||||||||||||||||||||||||||||||||||||||||||||||||||||||
| [ Team LiB ] |
|