| [ Team LiB ] |
|
Some PEAR Packages in ActionIn this section, we will work with a number of PEAR packages, starting with the Auth package we have already installed. We will also look at a package for documenting your code and a package for working with configuration files. The Auth PackageAuth is an object-oriented package designed to help you add password protection to your projects. Adding users, avoiding duplicate usernames, logging users in, and authenticating users after they are logged in are all tasks the Web programmer encounters repeatedly. Auth handles the donkey work, leaving you free to concentrate on your project's logic. In this section we will look at the Auth class and its methods. We will also use Auth with some procedural code to build a simple password-protected environment. It is important to note that the packages we cover were written for PHP 4 and do not use PHP 5 features such as exceptions and abstract classes. New features will likely be introduced over time, and you should keep an eye on the documentation to see whether anything has changed. Installing AuthWe have already looked at the procedure for downloading Auth: pear install Auth Auth uses the File_Passwd package, which in turn requires the Crypt_CHAP package. So, we should install these, too: pear install Crypt_CHAP pear install File_Passwd Now we should be ready to work with the Auth package. Working with the Auth ClassNow that we have Auth, we can jump in and instantiate an Auth object:
require_once("Auth/Auth.php");
$auth = new Auth("File", "./passfile.txt", "write_login" );
We use require_once() to make Auth available to our script and then instantiate an Auth object. The Auth class's constructor first requires a storage driver string as its first argument, storage-specific options for its second argument, and the name of a function to use to display a login screen if authentication fails. Let's look more closely at the storage container issue. Rather than force you to use a specific mechanism for storing and retrieving passwords, Auth works transparently with several storage mechanisms, including files, databases, and even POP mail servers. If we had installed the DB package, for example, we could have used the following syntax to instantiate an Auth object:
$auth = new Auth("DB", "mysql://dbuser:dbpass@host/db", "write_login" );
We tell the Auth class's constructor that we are using a database and pass it a data source name (DSN) in the option argument. The Auth package uses the DB package to work with a database, and we need to think no more about it (assuming we have configured a database server to have the correct database, table, and fields). A detailed examination of storage drivers is beyond our scope, but you can read more about them at http://pear.php.net/manual/en/package.authentication.auth.intro-storage.php. For our example, we will use the File driver, which uses the File_Passwd package we have already installed. Now that we have an Auth object, it is our responsibility to create a function called write_login() that presents a login form. This is automatically called when authorization fails. In fact, if we had omitted the third argument to the Auth constructor, the object would write a form for us automatically, which can be handy for testing purposes. We will create our own function, however:
require_once("Auth/Auth.php");
$auth = new Auth("File", "./mypass.txt", "write_login" );
$auth->start();
$auth->addUser( "bob", "bobpass" );

function write_login() {
  print <<<BLOCK
  <form method="post" action="{$_SERVER['PHP_SELF']}">
  <p>User<br /><input type="text" name="username" /></p>
  <p>Pass<br /><input type="password" name="password" /></p>
  <p><input type="submit" value="login" /></p>
  </form>
BLOCK;
}
In this fragment we again instantiate an Auth object. We create a function called write_login() that prints a form if authorization fails. Notice the technique we use for printing multiple lines: This syntax is similar to using double quotation marks in that variables are interpreted, but with the important differences that we don't have to escape double quotation marks inside the string and that we can work with multiple lines of text. The form is straightforward, presenting username and password input text boxes. The names of the fields, username and password, are mandatory; apart from that, we can present the form any way we please. Notice some new methods in the previous fragment. Auth::start() kicks off the authentication process. You should call it for any pages you want to password protect. Because it uses session functions behind the scenes, you should ensure that no text has been sent to the browser before using it. We also introduce the Auth::addUser() method, which accepts username and password string arguments and adds a user to the system. If the user in question exists, Auth::addUser() returns a PEAR_Error object. Otherwise, it returns true to signal that the user has been added to the system. PEAR_Error objects contain useful debugging information, in particular, $code and $message properties that detail the nature of the error in question. In the previous fragment, the addUser() method generates a PEAR_Error object every time the script is called apart from the first. This is because the user, bob, already exists after the first request. So, if we test the previous fragment, the user is presented with a login form until he finally types in an acceptable username and password. Thereafter, he is presented with a blank screen. How can we welcome bob to the private area of our site? Here's how:
if ( $auth->getAuth() ) {
  print "</h1>Welcome, {$auth->getUsername()}</h1>";
}
The Auth::getAuth() method returns true if the user has been authorized, and false otherwise. So, we can use it to present members-only content. We can use Auth::getUsername() to personalize our message. Finally, let's be really safe and force bob to log in for every request he makes: $auth->logout(); Clearly, we would allow bob to choose to log out, rather than logging him out for every request. But we have given the main Auth package methods an airing here. In the next section, we use Auth to build a more useful example. An ExampleWe will use procedural rather than object-oriented code to keep this example compact. We will, however, introduce a couple of useful techniques. In particular, we are going to completely separate our presentation code, the HTML output, from our script logic. In Listing 23.1 you can see an output page that displayed if authentication fails. Listing 23.1 The Login View for the Authentication Example1: <!DOCTYPE html PUBLIC 2: "-//W3C//DTD XHTML 1.0 Strict//EN" 3: "http://www.w3.org/TR/xhtml1/DTD/xhtml1-strict.dtd"> 4: <html> 5: <head> 6: <title>login</title> 7: </head> 8: <body> 9: <h1>Login</h1> 10: 11: <?php include( "listing23.2.php" ); ?> 12: 13: <div> 14: <form method="post" action="<?php echo $_SERVER['PHP_SELF'] ?>"> 15: <p>Username<br /> 16: <input type="text" name="username" 17: value="<?php echo $_REQUEST['username'] ?>" /> 18: </p><p>Pass<br /> 19: <input type="password" name="password" /> 20: </p><p> 21: <input type="submit" value="login" /> 22: </p> 23: </form> 24: </div> 25: 26: </body> 27: </html> Listing 23.1 is almost entirely presentation. We call a presentation helper, listing23.2.php on line 11. Apart from that, we simply present a login form. This script is not designed to be called directly. Instead it is included by a controlling script. Listing 23.2 shows the script we included on line 11. Listing 23.2 The Navigation Helper for the Authentication Example
 1: <?php
 2: if ( ! empty( $GLOBALS['PAGE']['msg'] )) {
 3:   print "<h2>".$GLOBALS['PAGE']['msg']."</h2>";
 4: }
 5: ?>
 6: <p>
 7: <a href="?cmd=main">home</a>
 8:
 9: <?php
10: if ( $GLOBALS['PAGE']['AUTH'] ->getAuth() ) {
11:   print ' | <a href="?cmd=logout">logout</a>';
12: } else {
13:   print ' | <a href="?cmd=signup">signup</a>';
14: }
15: ?>
16: </p>
The script in Listing 23.2provides some functionality for navigation and feedback. It is a little more interesting than Listing 23.1, in that it uses a global variable called $PAGE. All views in this script can expect to have access to the $PAGE array and to find it populated with an 'AUTH' element containing an Auth object. On line 2 we test for a $PAGE['msg'] element, and if it exists, we print it to the browser. By this means, all views can send messages to the user. On line 10 we use the Auth object contained in $PAGE['AUTH'] to call the Auth::getAuth() method. If the user has been authenticated, we print navigation for logging out. Otherwise, we offer the opportunity for the user to sign up. Notice that we don't reference any views directly, but pass a cmd request argument to the current script. As far as the views are concerned, that is all that is of interest for now. Now let's look at the controller at the heart of this system. The controller is responsible for authentication and deciding which views should be presented to the user. All requests should be routed directly through this central script, and the views are displayed using the include() function. You can see the controller script in Listing 23.3. Listing 23.3 The Controller Script for the Authentication Example
 1: <?php
 2: require_once "Auth/Auth.php";
 3:
 4: $LEGAL_FUNCS = array( "main", "signup", "logout" );
 5: $PAGE['AUTH'] = new Auth("File", "../data/passfile.txt", "write_login" );
 6: $PAGE['msg'] = "";
 7:
 8: switchboard();
 9: function switchboard() {
10:   $comms = $GLOBALS['LEGAL_FUNCS'];
11:   $cmd = $_REQUEST['cmd'];
12:   if ( empty($cmd) || ! in_array( $cmd, $comms) ) {
13:     $cmd = $comms[0];
14:   }
15:   $page = $cmd();
16:   if ( ! empty( $page ) ) {
17:     @include( $page );
18:   }
19: }
20:
21: function setMessage( $msg ) {
22:   $GLOBALS['PAGE']['msg'] .= "$msg<br />";
23: }
24:
25: // auth functions ///////////////////////
26:
27: function authenticate() {
28:   $auth = $GLOBALS['PAGE']['AUTH'];
29:   $auth->start();
30:   if ( ! $auth->getAuth() ) {
31:     exit();
32:   }
33:
34:   return true;
35: }
36:
37: function write_login() {
38:   $auth = $GLOBALS['PAGE']['AUTH'];
39:   if ( $auth->getStatus() == AUTH_EXPIRED ) {
40:     setMessage("Your session has expired");
41:   } else if ( $auth->getStatus() == AUTH_WRONG_LOGIN ) {
42:     setMessage("Login failed. Try again or sign up");
43:   }
44:   // include login
45:   include_once( "listing23.1.php" );
46: }
47:
48: // page functions ///////////////////////
49:
50: function signup() {
51:   if ( empty( $_REQUEST['username'] ) ) {
52:     // return sign up page
53:     return "listing23.signup.php";
54:   }
55:   $signup = $GLOBALS['PAGE']['AUTH'] ->addUser(
56:     $_REQUEST['username'], $_REQUEST['password'] );
57:   if ( $signup instanceof pear_error ) {
58:     setMessage( $signup->message );
59:     // return sign up page
60:     return "listing23.signup.php";
61:   }
62:   setMessage( "Signup successful" );
63:   return main();
64: }
65:
66: function logout() {
67:   $auth=$GLOBALS['PAGE']['AUTH'];
68:   authenticate();
69:   $auth->logout();
70:   setMessage($auth->getUsername()." logged out");
71:   return write_login();
72: }
73:
74: function main() {
75:   authenticate();
76:   // return main page
77:   return "listing23.main.php";
78: }
79: ?>
We set up a global array called $LEGAL_FUNCS on line 4. This contains strings that we will accept in the cmd request parameter. We need to check the user input because we will be calling functions dynamically. On line 5 we initialize our Auth object and store it in $PAGE['AUTH']. Remember that the $PAGE array is our notice board where we place information the views will use. We must ensure that both the data directory and the passfile.txt file are writeable by the server process. On line 6 we initialize another $PAGE element. $PAGE["msg"] contains any feedback we want to send to the user. It can be populated from anywhere in the script by calling the setMessage() function on line 21. The core of the script lies in the switchboard() function on line 9. This attempts to extract a value from $_REQUEST['cmd'], assigning it to the local $cmd variable. If there is no $_REQUEST["cmd"] element or its value is not found in the global $LEGAL_FUNCS array, we assign a default value to $cmd: the first element of the $LEGAL_FUNCS array. In this way we will always have a $cmd variable that is non-empty and legal. We can now dynamically call one of our command functionsthat is, one of main(), logout(), and signup(). Command functions optionally return page strings, and if such a string is returned, we use the include() function to display the document on line 17. This provides us with a crude dispatch mechanism. The signup() function, for example, can choose whether to keep the user on the sign-up screen (by returning the sign-up document's name) or forward her elsewhere. The authenticate() function on line 27 is the policeman of the script: It stops script execution dead if the user is not valid. We get the Auth object on line 28 and call Auth::start() on line 29. If Auth::getAuth() fails, we call exit(), ending the script. We know, however, that the write_login() function on line 37 has been called by the Auth object before we end the script. write_login() has two responsibilities. First, it calls a new method for us, Auth::getStatus(), which returns an error flag if problems have occurred. We test the value returned by the getStatus() method against the constants AUTH_EXPIRED and AUTH_WRONG_LOGIN; then we send feedback to the user if one of them matches. Finally, we include the login page on line 45. The default function is main() on line 74. This is because it is the first function listed in the $LEGAL_FUNCS global array. main() is called by the switchboard() function if the client does not provide a cmd request parameter (accessible from $_REQUEST['cmd']) or if the cmd parameter contains the string 'main'. The main() function calls authenticate(). If the user is new or unauthorized, authenticate() hijacks the script, causing write_login() to be called and ending execution. Otherwise, main() returns the name of our protected page on line 77. The switchboard() function calls include() with this return value, and the user sees the view contained in this page. The remaining command methods are signup() and logout(). The signup() function on line 50 is called by the switchboard() function if a cmd request parameter is present and contains the string 'signup'. We test for the username request parameter on line 51, using it as a flag to test whether our sign-up form has been submitted. If the parameter is not present, we decide that the user has arrived freshly at the sign-up page and return the document name of the sign-up view on line 53. The view is almost identical to the login screen in Listing 23.1, except it includes a hidden form field: <input type="hidden" name="cmd" value="signup" /> This ensures that script flow returns to the signup() function when the form is submitted. If the username parameter is present, we know that the form has been submitted. We therefore call the Auth::addUser() method on line 55, passing it our user input. We test the return value from Auth::addUser() on line 57. If we have received an instance of the PEAR_Error class, we know that all has not gone well. So, we extract the error message from PEAR_Error::message and pass it back to the user by calling setMessage() on line 58. We return the sign-up page's name on line 60, requiring the user to attempt another sign-up. Assuming that the function has not yet returned a value, we can celebrate a successful sign-up. We set a success message on line 62 and hand control over to the main() function. Remember that main() authenticates and then allows the user through to our protected data. The final command function is logout() on line 66. This is invoked by the switchboard() function if the cmd parameter contains the string 'logout'. We cannot log out a user without first authenticating him, so we call our authenticate() function on line 68. If authentication fails, the user is sent to the login view, which is the desired result in any case. Assuming that authentication was successful, we call setMessage() on line 70 to feed back to the user and call the write_login() method to present the login page. Listing 23.3 is a crude but effective model for writing small scripts. We can now easily add a new page command to the $LEGAL_FUNCS array on line 4, creating a function with the same name. The script will automatically recognize and call our new function. Simply by adding authenticate() to our new function it will be protected from unregistered users. In the next hour, we will look at an altogether more sophisticated method for organizing projects. The PhpDocumentor PackageSo, your project is a success. It has grown in size and power, and you are well pleased. Next, it is time to bring in another developer to work with you. She takes a look at your code and sees directory after directory, file after file of undocumented code. You both quickly realize that it will take weeks of unraveling your code before she can contribute fully. Perhaps it is time to consider PhpDocumentor. It is a cliché that developers dislike documentation, but in common with many clichés there is a grain of truth to it. Documentation is often seen as a luxury, eating into production time. In a competitive market, the time taken to document a project can eat into one's margins. On the other hand, the cost in errors and misconfigurations, and in the steep learning curve for developers taking on a project, can considerably outweigh the costs of documentation. You can also lessen the effort involved in documenting by doing it as you code, rather than waiting until the end of your project and despairing! PhpDocumentor is an enormously powerful tool for documenting PHP projects. It has two great uses. First, it produces developer-level documentation generated from within source files. Second, it uses the DocBook XML format to produce user-level tutorial files that can be transformed to resemble documentation like PHP's own manual at http://www.php.net/manual. Even with a whole hour at our disposal, we could barely scratch the PhpDocumentor package's full functionality, so we will look here at inline documentation aimed at developers. The idea of automated documentation using PhpDocumentor is derived from a Java tool called JavaDoc. JavaDoc reads java source files and generates a series of Web pages based on the contents, using hyperlinks to enable the reader to navigate the elements of the source. PhpDocumentor works in the same way: It reads the source files in a directory and builds a tree of pages. It recognizes and documents language elements such as classes, methods, and properties and handles relationships such as inheritance. This is useful, but it only lays bare the basic structure of a project. PhpDocumentor looks for special comment blocks and reads text and tags from within them. It incorporates the information it gleans from these DocBlocks into the Web pages it generates. The result is a set of detailed and easily navigable documents for your project. As with all PEAR packages, installation is easy: pear install phpdocumentor This creates a PhpDocumentor library package directory in PHP's library directory and a command-line script called phpdoc that you can run to generate documentation from your source code.
DocBlocksPhpDocumentor parses your source files looking for DocBlocks. These are special blocks of code that look like this: /** * A DocBlock */ The DocBlock looks very much like a standard multiline comment. The required additions are the second asterisk in the comment opening and the asterisks that begin each line within the comment. DocBlocks break down into three parts: a summary, a description, and tags. Tags are instructions to PhpDocumentor and provide information about the element being described. Tags take the form of an at character (@) followed by a keyword. Each tag then requires further arguments. Let's look at an example. In the fragment shown here, we add a class-level DocBlock to a project:
/**
* A class to list directories.
*
* This class works with DirectoryFilter class to list the
* the contents of a directory.
*
* @see   DirectoryFilter
* @author  Matt Zandstra
* @package FileUtil
*/
class DirectoryList {
  //...
}
We introduce our class with a summary line and then go into more detail with our description. We use a number of tags. @see is followed by the name of another class in the project. The class referenced automatically becomes a hyperlink in the documentation output. @see can also be followed by a filename, a class and method in the form MyClass::Method(), a property in the form MyClass::$property, and a standalone function in the form function(). The value that you use for @package defines an organizing principle for a set of classes. I usually organize my classes into directories and use the directory name as my package name. When the documentation is output, the class in the example will be grouped under a FileUtil link with others that share that @package value. The @author tag should be self-explanatory. You can see a sample PhpDocumentor output for our fragment in Figure 23.1. Figure 23.1. PhpDocumentor output for a class-level DocBlock.
Table 23.1 details some standard tags that are available for all DocBlock. Now that we have introduced a class, we can provide documentation for our class's properties:
class DirectoryList {

/**
* The directory to examine
* @access  public
* @var   String
*/
  var $directory;
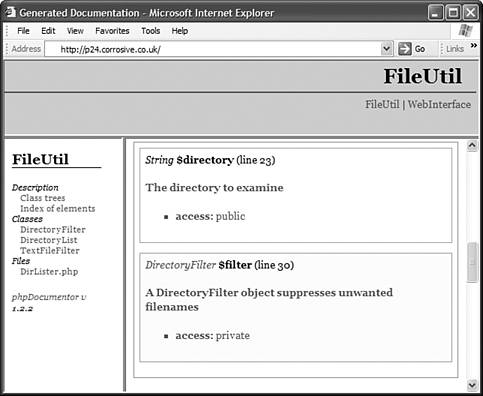
Notice that we are using PHP 4 syntax in this fragment. PhpDocumentor is incapable of handling PHP 5 elements at the time of writing, although this might well have changed by the time you read this. You can discover the current status of PhpDocumentor and find the complete documentation for it at http://phpdocu.sourceforge.net. We use the @access tag to signal to PhpDocumentor that we regard the property as public. We also state the data type of the property using the @var tag. This is important because PHP is loosely typed, so there is no constraint as to what can be stored in a property. Your documentation should therefore be as explicit as possible as to which property should store which data type. If we had declared the $directory property as private in the @access tag, it would not be displayed in documentation by default. This is also true of any DocBlocks containing the @internal tag. I often override this rule, however, to produce developer documentation. So, in Figure 23.2, you can see the output for our public $directory property and for a private $filter property. Notice that the $filter property has been declared to be of type DirectoryFilter. Because the DirectoryFilter class exists within the documentation, the type is displayed as a hyperlink. Figure 23.2. PhpDocumentor output for a property-level DocBlock.
Finally, let's look at a DocBlock for a method.
/**
* Accept a string and return true if the filename should be included
*
* This base class always returns 'true'
*
* @param  String   The string to check
* @return  Boolean   true if the file is acceptable for inclusion
*/
  function check( $txt ) {
    return true;
  }
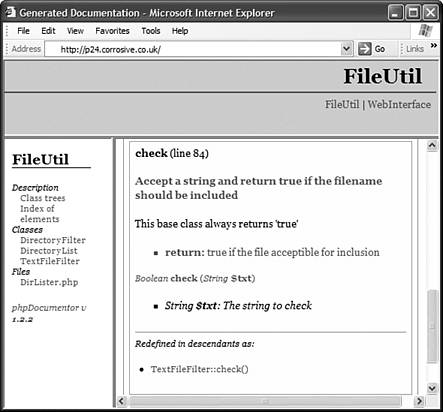
We include both a summary line and additional information. The @param tag provides information about arguments to the method. You should include one @param tag on its own line for each argument in order. The first parameter to the @param tag is the data type of the method argument, and the second parameter is a description of the argument and its purpose. The @return tag is used to describe the return value from a method. Again, the first parameter should be the expected data type, and the second should be a description. You can see the output for the method DocBlock in Figure 23.3. Figure 23.3. Documentation for a method.
Generating DocumentationSo far, we have discussed the DocBlock comments, and you have seen PhpDocumentor's output, but we have not talked about the mechanism for generating the output. There are a number of ways of doing this, but we will concentrate on using the command-line tool. The command phpdoc is automatically installed when you install PhpDocumentor. It is likely that you will find it in your path. In other words, you should be able to run it by simply typing phpdoc To generate your documentation, phpdoc needs a minimum amount of information from you. You pass this to the script using flags. The -d flag is used to pass the name of the directory to document, whereas the -t flag is used to pass the target, or destination, directory. Finally, I like to see my private properties and methods, so I pass the script a special flag, -pp, with the argument 'on'. pp stands for parse privates, and the flag causes private elements to be shown in documentation. Putting all this together, a typical call to phpdoc might look like this: phpdoc -d myproject -pp on -t /home/me/htdocs/mydocs/ There are many more flags to phpdoc. You can find a summary of them at http://phpdoc.org/docs/HTMLSmartyConverter/default/phpDocumentor/ tutorial_phpDocumentor.howto.pkg.html. That is a painful address to type into your browser, but if you are keen to work further with PhpDocumentor, it might well be worth the trouble. You will find a full description of available tags, more examples, and command-line instructions for Windows users. PhpDocumentor cannot make documentation painless, but it makes incorporating it into you programming routine easier. As your libraries grow in size and scope, you will have cause to be grateful that you developed the documentation habit. Editing Configuration Files with the Config PackageWriting code to use a configuration file is one of those programming tasks that you find yourself doing time and time again as a programmer. The simplest solution is to use a PHP file to contain configuration directives for your scripts. This can work well, but it can break down if your script needs to share configuration with other systems or you require nonprogrammers to edit it. The Config package is an extremely flexible way of building configuration files in a wide range of formats. First of all, we must install Config: pear install xml_util pear install config Config depends on the XML_Util package, so we install that first. Now, let's map out a configuration example. Let's imagine that we have created a forum application and want an administrator to be able to control its behavior from a configuration file. The Config package can generate a file for us, but first we need to construct the data tree. The Config package consists of a tree of element types that can be one of 'directive', 'section', 'comment', and 'blank'. Of these, 'section' can contain items of the other types. This is a lot easier than it sounds: You can create a section, add another section to it, and then add a comment and some directives (name/value pairs) to that. To get an element that we can work with, we need to instantiate a Config_Container object and pass it a type and name:
require_once("Config.php");
$root_container = new Config_Container("section", "forum-configuration");
This gives us an object of type "section" called "forum-configuration". The Config_Container class provides us with tools for creating other Config_Container objects of different types. We might want to add a name directive to our forum-configuration section, like so: $root_container->createDirective( "forum-name", "Matt's Forum" ); Config_Container::createDirective() requires the name of the directive and its value. The method both returns a new Config_Container object of the directive type and adds it to the current object. We now have a section that contains a directive. Let's add some more to our configuration file:
$perm_sec = $root_container->createSection("permissions");
$perm_sec->createDirective("allow-html-tags", "no");
$perm_sec->createDirective("uploads", "55");
$perm_sec->createDirective("allow-pictures", "yes");

$content_sec = $root_container->createSection("content");
$content_sec->createDirective("filter-obscenity", "no");
$content_sec->createDirective("inlude-newsfeeds", "yes");
We call a new method, Config_Container::createSection(), which requires a name argument andlike createDirective()returns another Config_Container object, adding it to the tree. So, our $root_container object now contains a directive and a section. We have a reference to the latest section in the $perm_sec variable, and we use it to create three directives. We then add another section to our $root_container, which we also populate. In addition to Config_Container::createDirective(), we also have access to these methods: createComment(), which requires a string containing the comment text, and createBlank(), which requires no argument and represents a blank line within a configuration file. Additional arguments to these methods can be used to determine where the elements are added, but this is beyond our scope here. Now that we have some sample data, we can write our configuration file. To do this, we can create a Config object:
$conf = new Config();
$conf->setRoot( $root_container );
$conf->writeConfig("./out.txt", "inifile" );
The Config class is principally used for directing the reading and writing of configuration data. We load it up with our $root_container Config_Container object and then call writeConfig() to write the data to a file. Config::writeConfig() requires a path to the file to write to and a config type string. This can be one of the following: 'apache', 'genericconf', 'inifile', 'inicommented', 'phparray', and 'xml'. In our example, we have chosen to output using the 'inifile' type. Let's take a look at the file we have written: [forum-configuration] forum-name=Matt's Forum [permissions] allow-html-tags=no uploads=55 allow-pictures=yes [content] filter-obscenity=no include-newsfeeds=yes If we change the config type from 'inifile' to 'xml' and run our script again, our output changes radically: <?xml version="1.0" encoding="ISO-8859-1"?> <forum-configuration> <forum-name>Matt's Forum</forum-name> <permissions> <allow-html-tags>no</allow-html-tags> <uploads>55</uploads> <allow-pictures>yes</allow-pictures> </permissions> <content> <filter-obscenity>no</filter-obscenity> <include-newsfeeds>yes</include-newsfeeds> </content> </forum-configuration> So far, we have concentrated on writing configuration files. Although this is useful, it is only half the story. Let's write some code to read our configuration file back into memory:
require_once("Config.php");
$conf = new Config();
$root = $conf->parseConfig("./out.txt", "inifile" );
print $root->toString('phparray', array( "name" => "my_conf" ) );
We instantiate a Config object and call a new method, parseConfig(), which is the mirror image of writeConfig(). We are working with a file of type 'inifile', which is a standard Windows configuration format and the type that PHP uses. The method returns a Config_Container object if all goes according to plan. If we were to add error checking to our fragment, we would need to test for a PEAR_Error object. This is the return value we would expect if an error were encountered. We assume that all is well, however, and call another new method. Config_Container::toString() outputs a string representation of a Config_Container object's contained data according to the config type it is passed. The second argument is an optional array of options. We have passed in an array with the name element set to 'my_conf'. You can see the effect of this here: $my_conf['forum-configuration']['forum-name'] = 'Matt's Forum'; $my_conf['permissions']['allow-html-tags'] = ''; $my_conf['permissions']['uploads'] = '55'; $my_conf['permissions']['allow-pictures'] = '1'; $my_conf['content']['filter-obscenity'] = ''; $my_conf['content']['include-newsfeeds'] = '1'; If we had not provided the option array, the default name of conf would have been used for the output. Remember that the output in the previous fragment is a string representation of an array that can be written to a file and read back later. We work with the data we have acquired using Config::parseConfig, though, by using the Config_Container::toArray() method. By calling $root->toArray(), we acquire an array that we can work with before writing again to a configuration file. Now we can read from a configuration file, write to a configuration file, and output configuration data to a string. But how can we work with our data after we have acquired it? There are two approaches: We can use Config package methods to traverse and manipulate the tree of Config_Container objects, or we can convert our configuration into an array, manipulate the array, and then convert the array back to a Config data structure. This is the approach we are going to take now. Let's read in the configuration file we created earlier, and work with its contents:
require_once("Config.php");
$conf = new Config();
$root = $conf->parseConfig("./out.txt", "inicommented" );
$conf_array = $root->toArray();

$conf_array['root']['content']['filter-obscenity']=1;
$conf_array['root']['content']['max-article-length']=500;

$conf = new Config();
$root = $conf->parseConfig($conf_array['root'], "phparray" );
print $root->toString( "inicommented" );
We use ParseConfig() as before to acquire the configuration data. We then use a new method, Config_Container::toArray(), to get an array representation of the information. This is quick and easy to work with. An interesting thing to note about the inifile and inicommented formats is that they flatten out your data structure. You need to be aware of this when you convert between configuration formats. We started off with a structure that had a root container called forum-configuration. In reading back the same data, we find that this has become the first child container and the Config package has had to create a new default root container, called root. The other thing to note is that if you want to preserve data as it was input, it is generally safer to use inicommented as your config type. This causes the invocation of a slower but more faithful parser. If speed is an issue, however, you should use the inifile config type in your parseConfig() call. We manipulate the array passed back to us by toArray(). We change the filter-obscenity directive and create a new directive called max-article-length. We pass our array to the parseConfig() method of a new Config object. We need to pass the phparray config type to tell the Config object to parse our array rather than a file. Finally, we output our new information to check that we have made the changes we wanted: [forum-configuration] forum-name=Matt's Forum [permissions] allow-html-tags=no uploads=55 allow-pictures=yes [content] filter-obscenity=1 include-newsfeeds=yes max-article-length=500 We have only scratched the surface of the Config package, but you might already see the hours of programming it could save you in your own projects. Even if you are never going to write or read a configuration file in your coding career, these examples should illustrate the usefulness of the PEAR project. PEAR is a database of quality-controlled, continually updated tools. It is designed to take the sweat and duplication out of working on PHP projects. It is very big, and it is growing all the time. |
| [ Team LiB ] |
|