Previous Page
Next Page

Using Sliding Menus

A sliding menu is a simple user interface widget that lets you put a lot of information on a page without cluttering it all up. The user can view just as much (or as little) of the extra information as they want to see at a time. Script 14.1 contains the HTML, Script 14.2 the CSS, and Script 14.3 the JavaScript, as shown below.

Script 14.1. Here's a straightforward HTML page with a lot of links.

<!DOCTYPE html PUBLIC "-//W3C//DTD XHTML 1.0 Transitional//EN">
<html xmlns="http://www.w3.org/1999/xhtml">
<head>
     <title>Shakespeare's Plays</title>
     <link rel="stylesheet" rev="stylesheet" href="script01.css" />
     <script type="text/javascript" language="Javascript" src="script01.js">
     </script>
</head>
<body>
     <h1>Shakespeare's Plays</h1>
     <div>
        <a href="menu1.html" class="menuLink">Comedies</a>
        <ul class="menu" id="menu1">
           <li><a href="pg1.html">All's Well That Ends Well</a></li>
           <li><a href="pg2.html">As You Like It</a></li>
           <li><a href="pg3.html">Love's Labour's Lost</a></li>
           <li><a href="pg4.html">The Comedy of Errors</a></li>
        </ul>
     </div>
     <div>
        <a href="menu2.html" class="menuLink">Tragedies</a>
        <ul class="menu" id="menu2">
           <li><a href="pg5.html">Anthony &amp; Cleopatra</a></li>
           <li><a href="pg6.html">Hamlet</a></li>
           <li><a href="pg7.html">Romeo &amp; Juliet</a></li>
        </ul>
     </div>
     <div>
        <a href="menu3.html" class="menuLink">Histories</a>
        <ul class="menu" id="menu3">
           <li><a href="pg8.html">Henry IV, Part 1</a></li>
           <li><a href="pg9.html">Henry IV, Part 2</a></li>
        </ul>
     </div>
</body>
</html>

Script 14.2. It doesn't take much CSS to pull off this effect.

body {
     background-color: white;
     color: black;
}

div {
     margin-bottom: 10px;
}

ul.menu {
     display: none;
     list-style-type: none;
     margin-top: 5px;
}

a.menuLink {
     font-size: 16px;
     font-weight: bold;
}

Script 14.3. Text (and links) can appear and disappear with this script.

window.onload = initAll;

function initAll() {
     var allLinks = document.getElementsByTag Name("a");

     for (var i=0; i<allLinks.length; i++) {
        if (allLinks[i].className.indexOf  ("menuLink") > -1) {
           allLinks[i].onclick = toggleMenu;
        }
     }
}

function toggleMenu() {
     var startMenu = this.href.lastIndexOf  ("/")+1;
     var stopMenu = this.href.lastIndexOf(".");
     var thisMenuName = this.href.substring  (startMenu,stopMenu);

     var thisMenu = document.getElementById  (thisMenuName).style;
     thisMenu.display = (thisMenu.display == "block") ? "none" : "block";

     return false;
}

To use sliding menus:

1.
var allLinks = document.getElements ByTagName("a");


When the page loads, the initAll() function is called, and it begins by creating an array of all the links on the page.

2.
for (var i=0;i<allLinks.length;i++) {
  if (allLinks[i].className. indexOf("menuLink") > -1) {
    allLinks[i].onclick = toggleMenu;
  }
}


Once we have all the links, we loop through them, looking for those links with a class of menuLink and adding an onclick handler to just those links. Here, that onclick handler is set to call the toggleMenu() function when they're clicked.

3.
var startMenu = this.href. lastIndexOf("/")+1;
var stopMenu = this.href. lastIndexOf(".");


Inside toggleMenu(), JavaScript has passed us this. Here, this is the link object that the user clicked, which means that this.href is the full link URL. But we only want the part between the last forward slash and the last period (that is, if the link was to http://www.javascriptworld.com/index.html, we'd only want "index"), so we create and set startMenu and stopMenu to be the locations in this.href where we want to start and stop finding the string that will end up being our menu name.

4.
var thisMenuName = this.href. substring(startMenu,stopMenu);


The menu name we want is between those two positions, so here's where we set it.

5.
var thisMenu = document. getElementById (thisMenuName). style;


The variable thisMenu is set to a reference to the desired menu using the getElementById() method.

6.
thisMenu.display = (thisMenu.display == "block") ? "none" : "block";


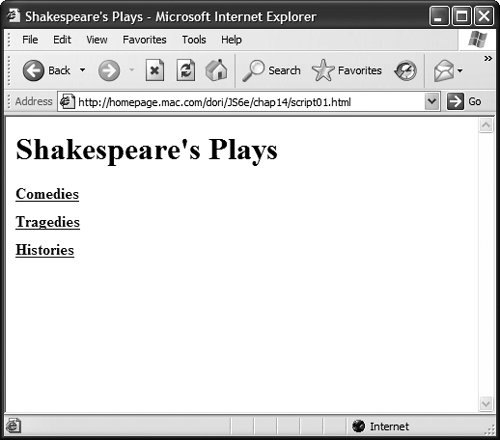
If the display property of thisMenu is block, then this code changes it to none. Alternatively, if it's none, it's changed to block. This is what toggles the menu display, as shown in Figures 14.1 and 14.2.

Figure 14.1. The initial view of the sliding menus.


Figure 14.2. After a click, the menu expands and the additional choices appear.


7.
return false;


And finally, we return a value of falsethat's because the toggleMenu() function was called due to an onclick event handler on a link. When we return false, the href attribute never gets loaded into the browser window, so the viewer stays on the same page.


Previous Page
Next Page