1. |
var newText, newBr;
var newWindow = window.open("", "newWin","location,scrollbars, resizable=yes,width=300,
 height=300"); height=300");
In the initWindows() function, we declare two new variables, newText and newBr. The following line opens the new window, sets its parameters, and assigns it to the variable newWindow.
|
2. |
var newDoc = newWindow.document;
This new variable, newDoc, stores our new window's document object, which we'll change in the next step.
|
3. |
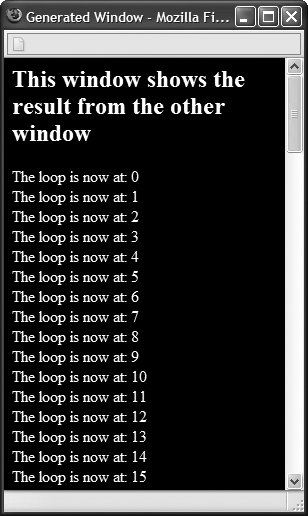
newDoc.title = "Generated Window";
newDoc.bgColor = "#000000";
newDoc.fgColor = "#FFFFFF";
newDoc.body.innerHTML = "<h2>This window shows the result from the other window<\/h2><div
id= 'looper'> </div>";
This is the cool part, where we set the properties of the newDoc object (in other words, the contents of the window we've created). We can set that new document's title, background color, foreground color, and body.innerHTML (the contents of the document's body tag) to be whatever we want. In this case, we're generating the HTML headers and the first part of the page body ( Figure 6.10).
|
| |
4. |
var loopDiv = newDoc.getElementById ("looper");
You probably noticed that the div at the end of the last step has the id "looper"that's the div that we're going to be adding to shortly. To do that, we create and set the new loopDiv variable.
|
5. |
We're starting a loop with the counter variable i. Set i to zero to begin; then, as long as i is less than 100, we increment the value of i by 1.
|
6. |
newText = newDoc.createTextNode ("The loop is now at: " + i);
newBr = newDoc.createElement("br");
We need to create elements that we can then add to the looper div. Previously in this chapter, we've changed innerHTML, which overwrites what's already in that div. In this case, though, we want to add on, not overwrite. The two built-in functions, createTextNode() and createElement(), allow us to respectively create a text node and an element (in this case, a <br /> element) on the fly.
|
7. |
loopDiv.appendChild(newText);
loopDiv.appendChild(newBr);
Once those elements have been created, they can be added to the div by doing an appendChild() with the contents of the two variables we set previously. Using appendChild() and other methods of manipulating nodes will be covered in more depth in Chapter 12.
Once they're added, we're still in the loop, so we loop around again until the counter in step 5 hits 100.
|