|
|
< Day Day Up > |
|
Hack 3 IRC from Mac OS X
Several IRC clients are available for Mac OS X. Check them out for your favorite features. There is no shortage of IRC clients for Macintosh users. ChatZilla [Hack #4], the truly outstanding IRC client integrated into Mozilla, is popular among Mac users and can also be used on other operating systems. Non-Mozilla users have many alternatives, too. Some applications, such as Fire (http://fire.sourceforge.net), combine IRC chat with ICQ, AIM, and JabberIM. However, because the features of IRC are different than the set for other chat applications, IRC users may find themselves frustrated with these programs. The server-channel model is not clearly supported, and sending standard IRC commands is difficult when they are not all fully supported. One of the friendliest and three of the more popular, and more powerful, IRC clients available for OS X are presented here: Conversation, X-Chat Aqua, Snak, and IRCle. 1.4.1 ConversationConversation (http://www.conversation.pwp.blueyonder.co.uk) is about as close as you'll come to using iChat for IRC. It sports a rather iChat-like look-and-feel (Figure 1-3) with just about everything accessible through an intuitive set of buttons and switches and drag-and-drop support throughout. A Favorites list holds your best buddies and preferred channels so you can just log on and click your way to conversation. A Recent Channels and Users list helps you find that person you were chatting with yesterday or where you had that fabulous conversation last week. Or just set things up so you automatically log in and join your various discussion channels automatically. Figure 1-3. Conversation, an iChat-like IRC client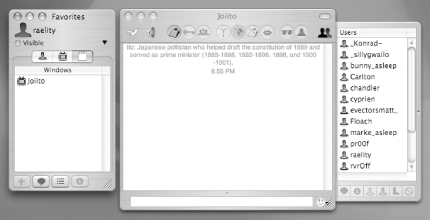 While you're best off comparing and contrasting Conversation's feature set with the other clients covered here, it's a good bet you'll find it an intuitive vehicle for your first foray into IRC. 1.4.2 X-Chat AquaX-Chat Aqua is an OS X version of the popular Unix IRC client, XChat. It is freeware that can be downloaded from http://xchataqua.sourceforge.net. When X-Chat launches, you are prompted to enter nicknames and personal information and to choose a server in the Server List window (see Figure 1-4). A list of networks is provided by default, and you have the option to add to the list. Once nicks and server are selected, clicking Connect will connect and open a server window. Figure 1-4. The initial server list popup in X-Chat Aqua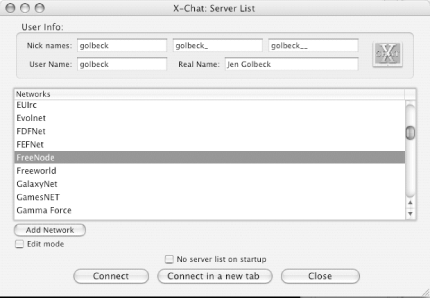 X-Chat Aqua can use a
tab- or window-based view
of channels and servers. The default setup puts each channel in a tab
at the bottom of the window as it is joined. Channels can be opened
in new windows, instead of as tabs, by using File Figure 1-5 shows a connection to the freenode IRC network (shown at the top of the window) and three channels (shown in tabs at the bottom of the window). Channel participants are displayed in the bar on the right. While this window is white on black, colors can be configured to your preferences. Figure 1-5. A main window for X-Chat Aqua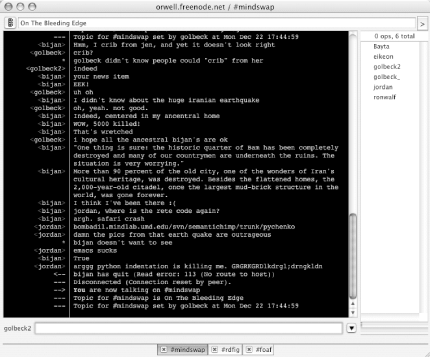 The File menu also has options to connect directly to a new server in either a tab or a new window or to use the Server List to establish a new connection. All commands and messages can be given in the input line at the bottom of each window, and some are also included as selectable options under the User menu. 1.4.3 SnakThe Snak IRC client is shareware that is free for 30 days. After that time, Snak will automatically quit after 30 minutes until it is registered for $20. Snak can be downloaded from http://www.snak.com. The Server List is the window in the lower-right corner (Figure 1-6). Notice that the #rdfig and #mindswap channels have been grouped into one window, while the server, irc.freenode.net, is in a separate window in the upper right. Figure 1-6. The main Snak window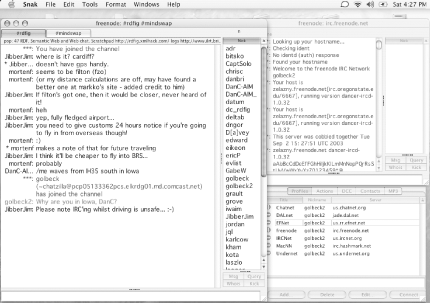 The first time Snak is launched, a wizard walks you through the process of creating a nickname and selecting a preferred channel. This information is stored in the Preferences. Connections to any server can be made through the Profile list. This window will come up by default and can also be found in the Windows menu. It lists all of the stored IRC servers with your preferred nick and startup commands. To connect to one of the servers, you can just locate it in the Server List and click Connect. Docking is an interesting feature of
Snak.
Channels can be open
in separate windows. Using the Dock command in the Windows menu, the
windows can be changed into tabs in other windows. This allows you to
group multiple channels any way you like; they need not necessarily
be docked with the server window. Channels can also be customized by
appearance. Each channel window can have its own color scheme, set
using Edit 1.4.4 IRCleIRCle is a Macintosh-only IRC client. It is available as shareware from http://www.ircle.com. The trial period is 30 days, and all features are enabled during the trial. Registration is $20 and gets rid of the warning messages that will appear when the application is launched. When IRCle is run for the first time, the Connections list needs to be modified. The Connections window should appear by default (as shown in Figure 1-7) but can also be found in the Windows menu if it doesn't. There will be 10 default connections—the maximum number of server connections that IRCle supports—and they will all be configured to use the nickname "ircleuser." To change this, click on a connection and then click the Edit... button at the bottom of the window. This will bring up a dialog box (Figure 1-8) where you can change your nickname, real name, exit message, and other properties. Figure 1-7. Connections window in IRCle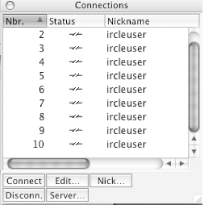 Figure 1-8. Changing your nickname in IRCle Connection Preferences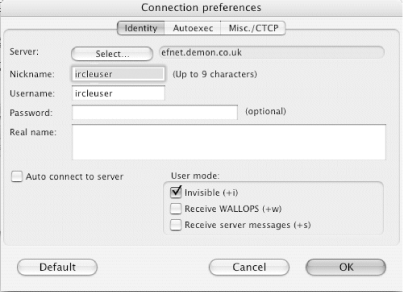 To connect to an IRC server with this new nickname, select the connection in the Connections window, and then click the Server... button. A window with a long list of servers will come up. You can choose from that list or click Add to add a new server. Once you have found the server you want in the list, click it, and then click Select. The connection is now configured to connect to the server. Click the Connect button in the Connections window to attach to the server. The server messages will appear in the Console window. The Inputline window is used to join channels, send commands, and type messages to a channel. Each channel will appear in its own window. Depending on which window is in focus, the Userlist window will change to show the name and participants of the current channel. Private chats established using /query will also get their own window. If someone else sends a private message to you without a separate window, the message will appear in the Console. The multitude of windows in IRCle, as seen in Figure 1-9, can become overwhelming. A feature called the Channelbar is available to make them a bit more manageable. Found under the Windows menu, the Channelbar puts a bar across the top of the window with buttons for each channel, console, and chat window. Clicking a button brings the corresponding channel to the foreground. Using option-click on a button will hide the selected channel window without disconnecting from it. Figure 1-9. IRCle running full screen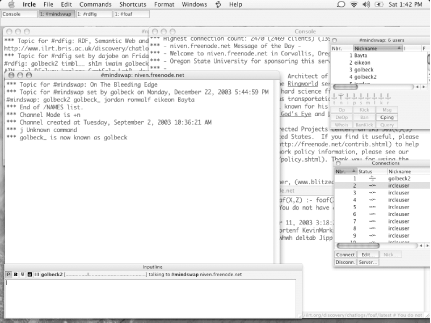 Now that you know about lots of Mac OS X IRC clients, it's up to you to decide which one you want to use. Perhaps after you've read this book, you may even be tempted to write your own. Jennifer Golbeck |
|
|
< Day Day Up > |
|