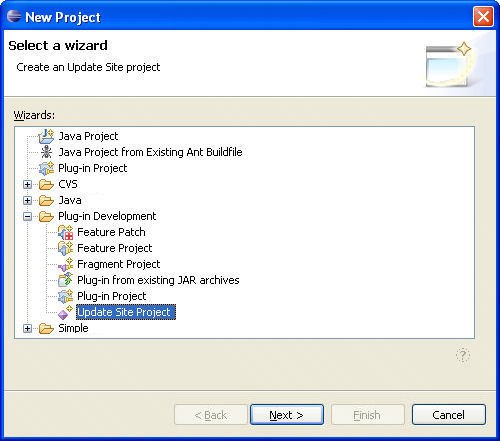
18.3. Update SitesAfter you have created a feature and provided a unifying structure and brand identity to your plug-ins, you need to deliver your feature to users. While you can package a feature as a compressed ZIP file or create your own installer (using InstallShield or something similar), Eclipse provides an attractive Web-based alternative that can manage the delivery, installation, and eventual updating of your feature. An Eclipse update site is a specially constructed Web site designed to host your features and plug-ins (packaged as JAR files) and describe them with a special site manifest file (the site.xml file). The Eclipse Update Manager can read this site manifest file and automatically load and install any updates (or new products) that it finds. 18.3.1. Creating an update site projectJust as plug-ins, fragments, and features are represented as projects in your workspace, so too are update sites. To create the update site, begin by using the New Project wizard to create a new Update Site Project (see Figure 18-18). Figure 18-18. The New Project wizardselecting an Update Site Project.
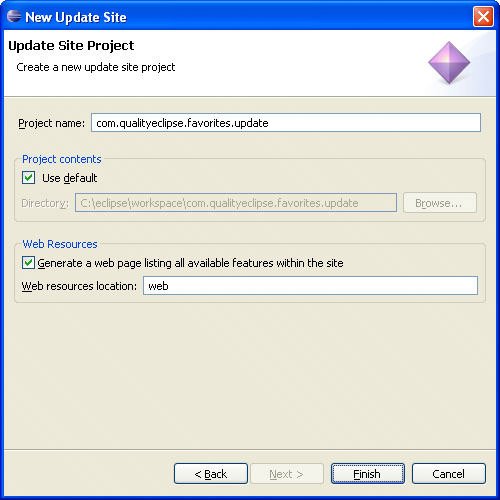
On the first and only page of the New Update Site wizard (see Figure 18-19), enter "com.qualityeclipse.favorites.update" as the project name. The Web Resources options control whether the wizard will generate a default home page for the update site. If a user visits the update site manually, this is the page they will see. Turn on the Generate a sample web page listing all available features within the site checkbox and leave the Web resources location field set to "web". Click the Finish button to create the project and its initial files. Figure 18-19. The New Update Site wizard.
Several files and directories are created by default: /web site.css site.xls index.html site.xml After you have added a feature to the site, two additional directories, /features and /plugins, will hold the JAR files containing the feature and plug-in files. When these files are uploaded to the update site, they will be accessible by the Update Manager. The /web directory contains the style sheet files used to provide the look of the update site. The index.html file is the main entry Web page for the site. Most of its contents are dynamically constructed based on the contents of the update site. 18.3.2. The site.xml fileThe most important file is the site manifest filesite.xml. Initially, it is empty for all practical purposes, so you will need to flesh out its definition. The site manifest editor provides a convenient interface for editing the existing characteristics of the site or adding new attributes. Double-clicking on the site manifest file will open the site manifest editor (see Figure 18-20). The editor has three pagesSite Map, Archives, and site.xml. Figure 18-20. The site manifest editor.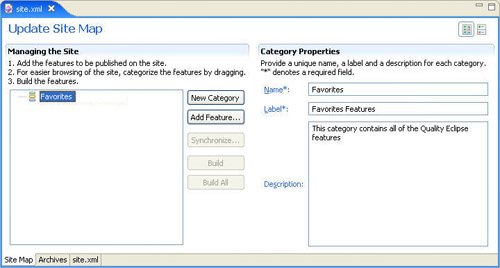
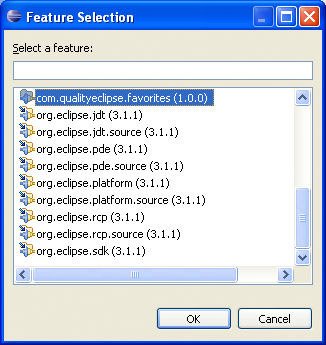
If more than one feature will be made available via the update site, you might want to place them in categories. Click the New Category button to create a new category. Every category should have a unique Name, a Label, and a Description that will appear in the update site and within the Update Manager. For the update site, enter "Favorites" for the Name and "Favorites Features" for the Label. Each category that you create is added to the Managing the Site list and acts as a drop target. If you want a specific feature to show up in more than one category, drag and drop the feature on each category. To add a feature to the Managing the Site list, click the Add Feature... button to see a list of features defined in the workspace in the Feature Selection dialog (see Figure 18-21). Select the "com.qualityeclipse.favorites" feature and click OK to add the Favorites feature to the list. Figure 18-21. The Feature Selection dialog.
Clicking on any feature in the Managing the Site list displays the Feature Properties and Feature Environments (see Figure 18-22). You will see one required and a number of optional fields that can be used to provide details about each feature. The required (and uneditable) URL field is used to specify the location (relative to the site.xml file) on the update site where the Update Manager can expect to find the feature's JAR file. For the Favorites feature, this should appear as "features/com.qualityeclipse. favorites_1.0.0.jar". The This feature is a patch for another feature option specifies whether this feature will be used to patch an existing feature (as opposed to updating it to a new version). Figure 18-22. The site manifest editor showing Feature Properties.
The remaining fields are optional and used to specify in which environments the selected feature is appropriate. These are very similar to the fields you saw within the feature manifest editor (see Figure 18-6 on page 625). You will generally leave these fields blank unless your feature has specific runtime requirements. Clicking the Build All button at this point will add the /features and /plugins directories to the project and populate them with the JAR files containing the feature and plug-in files. /features com.qualityeclipse.favorites_1.0.0.jar /plugins com.qualityeclipse.favorites_1.0.0.jar com.qualityeclipse.favorites.help_1.0.0.jar com.qualityeclipse.favorites.nl1_1.0.0.jar The Archives page (Figure 18-23) describes the update site and specifies its Web address, description, and any additional data archives. The URL field contains the root Web address of the update site. For the Favorites example, you will enter "http://com.qualityeclipse.com/update." Finally, enter a description for the site in the Description field and leave the Archive Mapping section blank. Figure 18-23. The Archives page of the site manifest editor.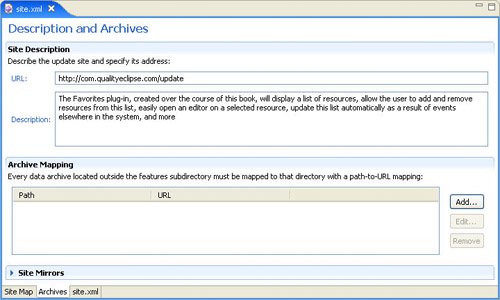
At this point, if you switch to the site.xml page of the editor, the source of the site.xml file will look something like this: <?xml version="1.0" encoding="UTF-8"?> <site> <description url="http://com.qualityeclipse.com/update"> The Favorites plug-in, created over the course of this book, will display a list of resources, allow the user to add and remove resources from this list, easily open an editor on a selected resource, update this list automatically as a result of events elsewhere in the system, and more. </description> <feature url="features/com.qualityeclipse.favorites_1.0.0.jar" id="com.qualityeclipse.favorites" version="1.0.0"> <category name="Favorites"/> </feature> <category-def name="Favorites" label="Favorites Features"> <description> The Favorites feature includes the Favorites plugin, the Favorites help plugin, and the Favorites NLS fragment. </description> </category-def> </site> 18.3.3. The update Web siteNow you can see what the update site will look like. Copy the various site map and JAR files within the update project to the update Web sitewww.qualityeclipse.com/update in the case of the Favorites example. Once the files are uploaded, you can point your Web browser at the update site's URL. The Favorites update site will show the description, categories, and features that you defined in the site manifest editor (see Figure 18-24). Figure 18-24. The Favorites update site.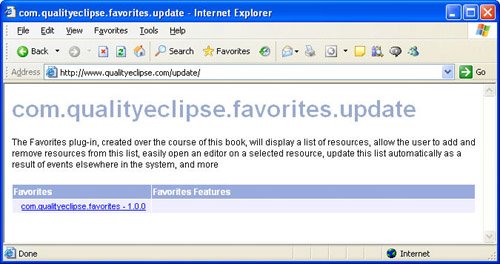
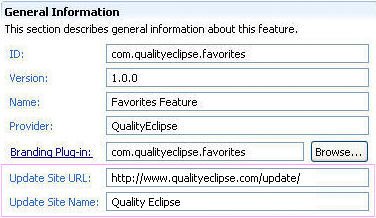
18.3.4. Revisiting the feature manifestWhen the feature manifest file was first discussed earlier in this chapter, we skipped over discussing the Update Site URL. As stated before, when the Update Manager is looking for updates to your plug-in, it will look at the site defined by your update URL. Reopen the feature manifest editor (see Section 18.1.3, Feature manifest editor, on page 624) and access the Overview page. In the General Information section of the editor, change the Update Site URL to "http://www.qualityeclipse.com/update" and the Update Site Name to "Quality Eclipse" (see Figure 18-25). Any time the Favorites feature needs to check for updates, it will search the specified update site. Figure 18-25. Feature URLs within the feature manifest file.
18.3.5. Accessing the update siteThe update site can be accessed using the Eclipse Update Manager in a variety of ways. Selecting the Help > Software Updates > Manage Configuration command will open the Product Configuration dialog (see Figure 18-26). Expanding the tree on the left will display a list of all the features loaded in the workspace. Clicking on a feature will show the feature's details on the right. Figure 18-26. The Product Configuration dialog.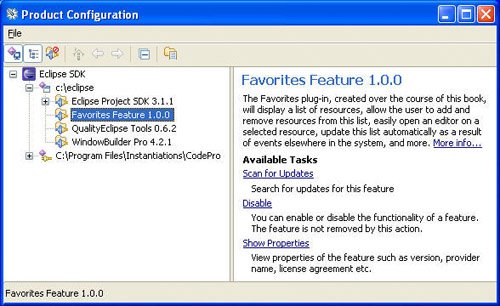
For each feature, several different tasks are available. The Disable task can be used to disable the feature, causing all its contributions to disappear from the workspace. If a feature has been disabled, the Disable task will be replaced with a matching Enable task. The Show Properties task will open a properties dialog showing the version, provider name, license agreement, and so on for the feature (see Figure 18-27). Figure 18-27. Properties for the Favorites feature.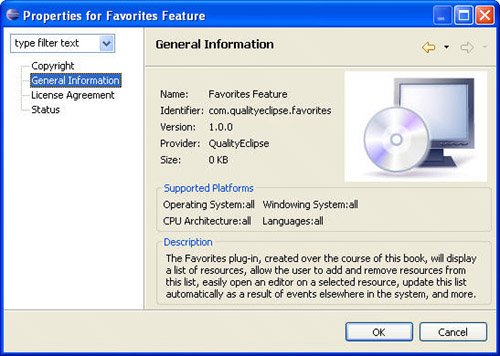
Any feature defining an update site URL will also show a Scan for Updates task. Clicking on that task will cause the Update Manager to go to the update site and read the site manifest file. It will then determine whether any newer updates for the feature are available. If any updates are available, they will appear in the Search Results wizard (see Figure 18-28). Figure 18-28. Update Manager search results.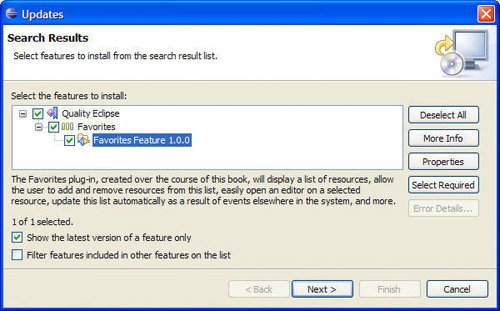
Clicking the Next button will switch to the Feature License page displaying the feature's license, which must be accepted before clicking the Next button to get to the Installation page (see Figure 18-29). Clicking the Finish button will initiate the installation process. Click the Install button in the Feature Verification dialog to install the update into your workspace. Figure 18-29. Feature Installation and Verification.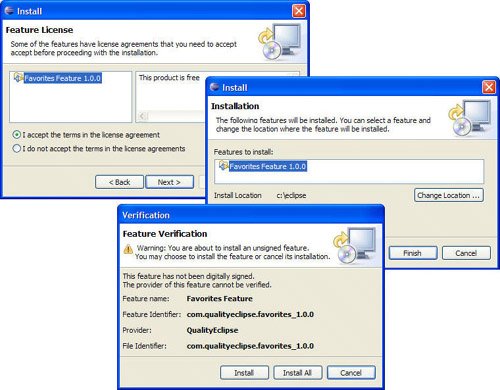
In addition to updating via the Product Configuration dialog, you can use the Feature Updates wizard, which can be accessed via the Help > Software Updates > Find and Install command (see Figure 18-30). Selecting the Search for updates of the currently installed features radio button and clicking the Next button will cause the Update Manager to scan the update sites for all the installed features and display any available updates in the Search Results wizard you saw earlier. Figure 18-30. The Feature Updates wizard.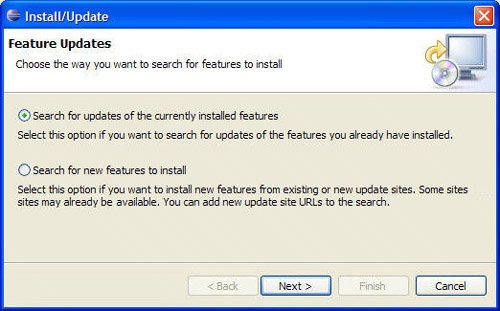
If you select the Search for new features to install option instead, you will be presented with the option of manually specifying any update sites to search for new features. If you click the New Remote Site... button and specify a site named "Quality Eclipse" with a URL of "http://www.qualityeclipse.com/update", the wizard will scan the update site, read the site manifest, and automatically discover the "Favorites Example" feature (see Figure 18-31). Clicking Finish will show any available features in the Search Results wizard (see Figure 18-28 on page 644). Clicking Next, accepting the license, and then clicking Finish will load the feature into your workspace as seen earlier (see Figure 18-29). Figure 18-31. Update sites to visit while looking for new features.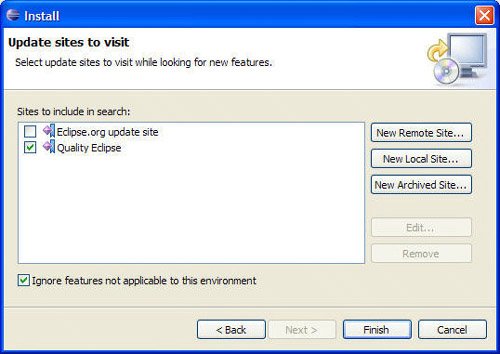
|