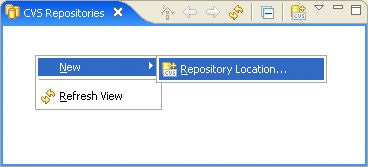
1.8. Team Development Using CVSTypically, you will want to work as part of a team and share your code with other team members. This section shows how to set up and use CVS, which ships as part of Eclipse. As team members work on different aspects of a project, changes are made locally to their own workspaces. When they are ready to share changes with other team members, they can commit them to the shared CVS repository. Likewise, when they want to get any changes made by other team members, they can update their workspaces with the contents of the repository. In the event of conflicts (e.g., changes made to the same resource), Eclipse provides comparison and merge tools to resolve and integrate such changes. CVS supports multiple streams of development known as branches. Each branch represents an independent set of changes made to the same set of resources. There may be multiple concurrent branches for various maintenance updates, bug fixes, experimental projects, and so on. The main branch, known as the "HEAD," represents the primary flow of work within a project. Just as the Eclipse local history feature records changes made to various resources over time, the CVS repository maintains a history of every committed change made to every resource over time. A resource may be compared with or replaced with any prior revision using tools similar to those used with the local history feature. 1.8.1. Getting started with CVSTo start using CVS with Eclipse, you will need to connect your Eclipse workspace to your CVS repository (see www.cvshome.org for information on setting up the repository). Start by opening either the CVS Repository Exploring perspective using the Window > Open Perspective > Other... command or the CVS Repositories view using the Window > Show View > Other... command. Next, right-click within the CVS Repositories view and select the New > Repository Location... command from the context menu (see Figure 1-55). Figure 1-55. CVS Repositories view.
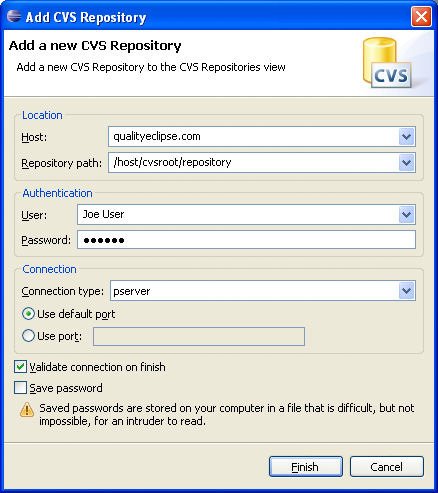
Within the Add CVS Repository dialog (see Figure 1-56), you need to specify the location of your repository and your login information. Enter the address of your CVS host into the Host field (e.g., "cvs.qualityeclipse.com") and the path of the repository relative to the host address into the Repository path field. Next, enter your user name and password into the User and Password fields, respectively, or leave them blank for anonymous access. If you need to use a different connect type than the default one, change that as well. When done, click the Finish button. Assuming that the CVS repository is found, it will show up in the CVS Repositories view. Figure 1-56. Add CVS Repository dialog.
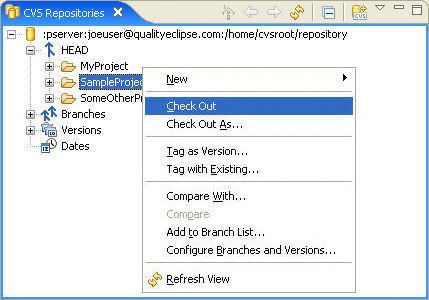
Tip The New Project wizard also provides a convenient option for creating a new repository. Select New > Project... and then the CVS > Checkout Projects from CVS wizard. On the first page of that wizard, choose the Create a new repository location option and click Next. The second page of the wizard will look like the dialog shown in Figure 1-56. 1.8.2. Checking out a project from CVSTo check out a project from your CVS repository, expand the repository location and then the HEAD item until you see the project you want to load. Right-click on the project and select the Check Out command from the context menu (see Figure 1-57). This loads the project into your workspace. Figure 1-57. Checking out a project.
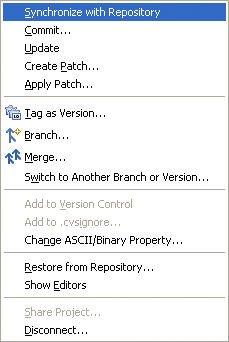
To load the project into a specially configured project (e.g., a project outside your workspace), use the Check Out As... command instead. Tip The New Project wizard also provides an option for checking out a project from an existing repository. Select New > Project... and then the CVS > Checkout Projects from CVS wizard. On the first page, choose the Use existing repository location option and the repository you wish to connect to and click Next. Selecting Use an existing module on the second page of the wizard will reveal a list of the projects in that repository. Select the desired projects and click the Finish button. 1.8.3. Synchronizing with the repositoryOnce changes have been made to the resources in the project, those changes should be committed back to the repository. Right-click on the resource (or the project containing the resource) and select the Team > Synchronize with Repository command (see Figure 1-58). Figure 1-58. Team context menu.
After comparing the resources in the workspace to those in the repository, the Synchronize view opens (see Figure 1-59). The Figure 1-59. Synchronize view.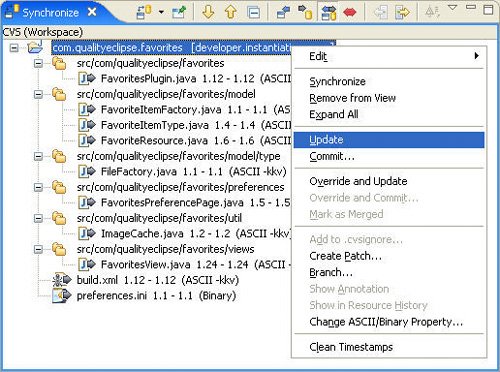
Right-click on the outgoing changes and select the Commit... command to commit those changes to the repository. Right-click on any incoming changes and select the Update command to load the changes into your workspace. If any conflicts occur (e.g., changes made by you and by another developer), you will need to use the merge tools that are provided in the Synchronize view to resolve the conflicts and then commit the merged version to the repository. 1.8.4. Comparing and replacing resourcesTo compare the current state of a file with an earlier revision stored in the repository, right-click on the file and select the Compare With > Revision... command from the context menu. This opens the Revisions editor, which shows earlier revisions of the file made to the HEAD stream or any branch (see Figure 1-60). Select any item in the revision list to see a comparison relative to the current state of the file. Figure 1-60. Compare with Revision editor.
A number of other resource comparison commands are also available. The Compare With > Latest from Head command compares the current state of the resource with the most recent version committed to a repository, and the Compare With > Another Branch or Version... command provides a way to compare a resource with a specific version or branch To replace the current version of a file with an earlier revision, right-click on the file and select the Replace With > Revision... command from the context menu. This opens the same comparison editor as shown in Figure 1-60. Select any revision and right-click, then select the Get Contents command to load that version into the workspace. 1.8.5. CVS label decoratorsTo make it easier to see which resources are under repository control and which might have been changed but not committed, CVS provides a number of label decorations to augment the icons and labels of CVS-controlled resources. To turn on the CVS label decorators, use the General > Appearance > Label Decorations preference page (see Figure 1-61). Figure 1-61. Label Decorations preference page.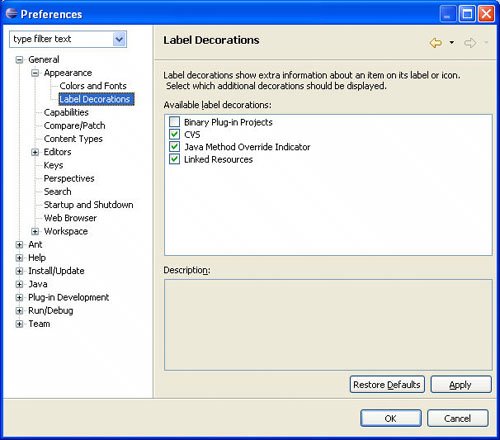
The actual decorations added are controlled by the options on the Team > CVS > Label Decorations preference page. By default, outgoing changes are prefixed with ">". Tip To make outgoing changes easier to see, CodePro includes a list colorization feature that changes the foreground or background color of any modified resource that is waiting to be committed to the repository. This and other third-party plug-ins are described in Appendix A. |