2.1. InstallationThe installation instructions given in this chapter are designed to apply to both active branches (1.x and 2.x) of the Apache web server running on Linux systems. If you are running some other flavor of Unix, I trust you will understand what the minimal differences between Linux and your system are. The configuration advice given in this chapter works well for non-Unix platforms (e.g., Windows) but the differences in the installation steps are more noticeable:
2.1.1. Source or BinaryOne of the first decisions you will make is whether to compile the server from the source or use a binary package. This is a good example of the dilemma I mentioned at the beginning of this chapter. There is no one correct decision for everyone or one correct decision for you alone. Consider some pros and cons of the different approaches:
This book shows the approach of compiling from the source code since that approach gives us the most power and the flexibility to change things according to our taste. To download the source code, go to http://httpd.apache.org and pick the latest release of the branch you want to use. 2.1.1.1 Downloading the source codeHabitually checking the integrity of archives you download from the Internet is a good idea. The Apache distribution system works through mirrors. Someone may decide to compromise a mirror and replace the genuine archive with a trojaned version (a version that feels like the original but is modified in some way, for example, programmed to allow the attacker unlimited access to the web server). You will go through a lot of trouble to secure your Apache installation, and it would be a shame to start with a compromised version. If you take a closer look at the Apache download page, you will discover that though archive links point to mirrors, archive signature links always point to the main Apache web site. One way to check the integrity is to calculate the MD5 sum of the archive and to compare it with the sum in the signature file. An MD5 sum is an example of a hash function, also known as one-way encryption (see Chapter 4 for further information). The basic idea is that, given data (such as a binary file), a hash function produces seemingly random output. However, the output is always the same when the input is the same, and it is not possible to reconstruct the input given the output. In the example below, the first command calculates the MD5 sum of the archive that was downloaded, and the second command downloads and displays the contents of the MD5 sum from the main Apache web site. You can see the sums are identical, which means the archive is genuine: $ md5sum httpd-2.0.50.tar.gz 8b251767212aebf41a13128bb70c0b41 httpd-2.0.50.tar.gz $ wget -O - -q http://www.apache.org/dist/httpd/httpd-2.0.50.tar.gz.md5 8b251767212aebf41a13128bb70c0b41 httpd-2.0.50.tar.gz Using MD5 sums to verify archive integrity can be circumvented if an intruder compromises the main distribution site. He will be able to replace the archives and the signature files, making the changes undetectable. A more robust, but also a more complex approach is to use public-key cryptography (described in detail in Chapter 4) for integrity validation. In this approach, Apache developers use their cryptographic keys to sign the distribution digitally. This can be done with the help of GnuPG, which is installed on most Unix systems by default. First, download the PGP signature for the appropriate archive, such as in this example: $ wget http://www.apache.org/dist/httpd/httpd-2.0.50.tar.gz.asc Attempting to verify the signature at this point will result in GnuPG complaining about not having the appropriate key to verify the signature: $ gpg httpd-2.0.50.tar.gz.asc gpg: Signature made Tue 29 Jun 2004 01:14:14 AM BST using DSA key ID DE885DD3 gpg: Can't check signature: public key not found GnuPG gives out the unique key ID (DE885DD3), which can be used to fetch the key from one of the key servers (for example, pgpkeys.mit.edu): $ gpg --keyserver pgpkeys.mit.edu --recv-key DE885DD3 gpg: /home/ivanr/.gnupg/trustdb.gpg: trustdb created gpg: key DE885DD3: public key "Sander Striker <striker@apache.org>" imported gpg: Total number processed: 1 gpg: imported: 1 This time, an attempt to check the signature gives satisfactory results: $ gpg httpd-2.0.50.tar.gz.asc gpg: Signature made Tue 29 Jun 2004 01:14:14 AM BST using DSA key ID DE885DD3 gpg: Good signature from "Sander Striker <striker@apache.org>" gpg: aka "Sander Striker <striker@striker.nl>" gpg: aka "Sander Striker <striker@striker.nl>" gpg: aka "Sander Striker <striker@apache.org>" gpg: checking the trustdb gpg: no ultimately trusted keys found Primary key fingerprint: 4C1E ADAD B4EF 5007 579C 919C 6635 B6C0 DE88 5DD3 At this point, we can be confident the archive is genuine. On the Apache web site, a file contains the public keys of all Apache developers (http://www.apache.org/dist/httpd/KEYS). You can use it to import all their keys at once but I prefer to download keys from a third-party key server. You should ignore the suspicious looking message ("no ultimately trusted keys found") for the time being. It is related to the concept of web of trust (covered in Chapter 4). 2.1.1.2 Downloading patchesSometimes, the best version of Apache is not contained in the most recent version archive. When a serious bug or a security problem is discovered, Apache developers will fix it quickly. But getting a new revision of the software release takes time because of the additional full testing overhead required. Sometimes, a problem is not considered serious enough to warrant an early next release. In such cases, source code patches are made available for download at http://www.apache.org/dist/httpd/patches/. Therefore, the complete source code download procedure consists of downloading the latest official release followed by a check for and possible download of optional patches. 2.1.2. Static Binary or Dynamic ModulesThe next big decision is whether to create a single static binary, or to compile Apache to use dynamically loadable modules. Again, the tradeoff is whether to spend more time in order to get more security.
2.1.3. Folder LocationsIn this chapter, I will assume the following locations for the specified types of files:
Installation locations are a matter of taste. You can adopt any layout you like as long as you use it consistently. Special care must be taken when deciding where to store the log files since they can grow over time. Make sure they reside on a partition with enough space and where they won't jeopardize the system by filling up the root partition. Different circumstances dictate different directory layouts. The layout used here is suitable when only one web site is running on the web server. In most cases, you will have many sites per server, in which case you should create a separate set of directories for each. For example, you might create the following directories for one of those sites: /var/www/apachesecurity.net/bin /var/www/apachesecurity.net/cgi-bin /var/www/apachesecurity.net/data /var/www/apachesecurity.net/htdocs /var/www/apachesecurity.net/logs A similar directory structure would exist for another one of the sites: /var/www/modsecurity.org/bin /var/www/modsecurity.org/cgi-bin /var/www/modsecurity.org/data /var/www/modsecurity.org/htdocs /var/www/modsecurity.org/logs 2.1.4. Installation InstructionsBefore the installation can take place Apache must be made aware of its environment. This is done through the configure script: $ ./configure --prefix=/usr/local/apache The configure script explores your operating system and creates the Makefile for it, so you can execute the following to start the actual compilation process, copy the files into the directory set by the --prefix option, and execute the apachectl script to start the Apache server: $ make # make install # /usr/local/apache/bin/apachectl start Though this will install and start Apache, you also need to configure your operating system to start Apache when it boots. The procedure differs from system to system on Unix platforms but is usually done by creating a symbolic link to the apachectl script for the relevant runlevel (servers typically use run level 3): # cd /etc/rc3.d # ln -s /usr/local/apache/bin/apachectl S85httpd On Windows, Apache is configured to start automatically when you install from a binary distribution, but you can do it from a command line by calling Apache with the -k install command switch. 2.1.4.1 Testing the installationTo verify the startup has succeeded, try to access the web server using a browser as a client. If it works you will see the famous "Seeing this instead of the website you expected?" page, as shown in Figure 2-1. At the time of this writing, there are talks on the Apache developers' list to reduce the welcome message to avoid confusing users (not administrators but those who stumble on active but unused Apache installations that are publicly available on the Internet). Figure 2-1. Apache post-installation welcome page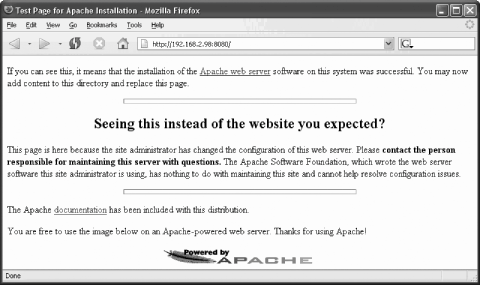 As a bonus, toward the end of the page, you will find a link to the Apache reference manual. If you are near a computer while reading this book, you can use this copy of the manual to learn configuration directive specifics. Using the ps tool, you can find out how many Apache processes there are: $ ps -Ao user,pid,ppid,cmd | grep httpd root 31738 1 /usr/local/apache/bin/httpd -k start httpd 31765 31738 /usr/local/apache/bin/httpd -k start httpd 31766 31738 /usr/local/apache/bin/httpd -k start httpd 31767 31738 /usr/local/apache/bin/httpd -k start httpd 31768 31738 /usr/local/apache/bin/httpd -k start httpd 31769 31738 /usr/local/apache/bin/httpd -k start Using tail, you can see what gets logged when different requests are processed. Enter a nonexistent filename in the browser location bar and send the request to the web server; then examine the access log (logs are in the /var/www/logs folder). The example below shows successful retrieval (as indicated by the 200 return status code) of a file that exists, followed by an unsuccessful attempt (404 return status code) to retrieve a file that does not exist: 192.168.2.3 - - [21/Jul/2004:17:12:22 +0100] "GET /manual/images/feather.gif HTTP/1.1" 200 6471 192.168.2.3 - - [21/Jul/2004:17:20:05 +0100] "GET /manual/not-here HTTP/1.1" 404 311 Here is what the error log contains for this example: [Wed Jul 21 17:17:04 2004] [notice] Apache/2.0.50 (Unix) configured -- resuming normal operations [Wed Jul 21 17:20:05 2004] [error] [client 192.168.2.3] File does not exist: /usr/local/apache/manual/not-here The idea is to become familiar with how Apache works. As you learn what constitutes normal behavior, you will learn how to spot unusual events. 2.1.4.2 Selecting modules to installThe theory behind module selection says that the smaller the number of modules running, the smaller the chances of a vulnerability being present in the server. Still, I do not think you will achieve much by being too strict with default Apache modules. The likelihood of a vulnerability being present in the code rises with the complexity of the module. Chances are that the really complex modules, such as mod_ssl (and the OpenSSL libraries behind it), are the dangerous ones. Your strategy should be to identify the modules you need to have as part of an installation and not to include anything extra. Spend some time researching the modules distributed with Apache so you can correctly identify which modules are needed and which can be safely turned off. The complete module reference is available at http://httpd.apache.org/docs-2.0/mod/. The following modules are more dangerous than the others, so you should consider whether your installation needs them:
On the other hand, you should include these modules in your installation:
In the configure example, I assumed acceptance of the default module list. In real situations, this should rarely happen as you will want to customize the module list to your needs. To obtain the list of modules activated by default in Apache 1, you can ask the configure script. I provide only a fragment of the output below, as the complete output is too long to reproduce in a book: $ ./configure --help ... [access=yes actions=yes alias=yes ] [asis=yes auth_anon=no auth_dbm=no ] [auth_db=no auth_digest=no auth=yes ] [autoindex=yes cern_meta=no cgi=yes ] [digest=no dir=yes env=yes ] [example=no expires=no headers=no ] [imap=yes include=yes info=no ] [log_agent=no log_config=yes log_forensic=no] [log_referer=no mime_magic=no mime=yes ] [mmap_static=no negotiation=yes proxy=no ] [rewrite=no setenvif=yes so=no ] [speling=no status=yes unique_id=no ] [userdir=yes usertrack=no vhost_alias=no ] ... As an example of interpreting the output, userdir=yes means that the module mod_userdir will be activated by default. Use the --enable-module and --disable-module directives to adjust the list of modules to be activated: $ ./configure \ > --prefix=/usr/local/apache \ > --enable-module=rewrite \ > --enable-module=so \ > --disable-module=imap \ > --disable-module=userdir Obtaining a list of modules activated by default in Apache 2 is more difficult. I obtained the following list by compiling Apache 2.0.49 without passing any parameters to the configure script and then asking the httpd binary to produce a list of modules: $ ./httpd -l Compiled in modules: core.c mod_access.c mod_auth.c mod_include.c mod_log_config.c mod_env.c mod_setenvif.c prefork.c http_core.c mod_mime.c mod_status.c mod_autoindex.c mod_asis.c mod_cgi.c mod_negotiation.c mod_dir.c mod_imap.c mod_actions.c mod_userdir.c mod_alias.c mod_so.c To change the default module list on Apache 2 requires a different syntax than that used on Apache 1: $ ./configure \ > --prefix=/usr/local/apache \ > --enable-rewrite \ > --enable-so \ > --disable-imap \ > --disable-userdir |
